loader-icon

All courses are now available in United States English and España Español. After purchase, use the language toggle in your course Player to switch between English and Spanish at any time.

All courses are now available in United States English and España Español. After purchase, use the language toggle in your course Player to switch between English and Spanish at any time.

Our Safety Blogs

Success 
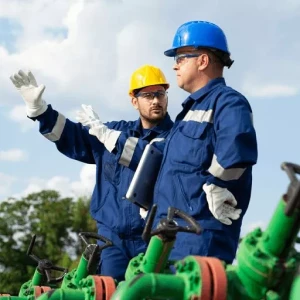
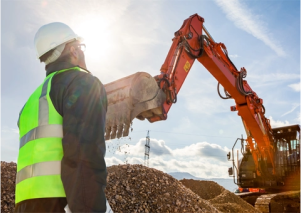
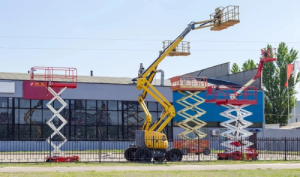
A comparison between scissor and boom lift.

Scissor Or Boom Lift; Which Is Safer for Your Job?

Scissor Or Boom Lift; Which Is Safer for Your Job? Introduction: One wrong lift choice can shut down a jobsite fast. A worker injured. Equipment sidelined. Progress stalled. For employers managing crews that work at height, this isn’t an abstract risk; it’s a recurring one. Each year, incident reports across the industry point to a common factor: using the wrong type of aerial lift for the job. In 2024, the International Powered Access Federation recorded 21 tip-over incidents involving mobile elevating work platforms, including 11 fatal cases. Many of these accidents occurred because operators used lifts unsuited to the terrain, exceeded load limits, or failed to account for environmental factors such as wind and slope. These aren’t isolated errors; they reflect how quickly a small equipment mismatch can escalate into a life-threatening situation. The takeaway is clear: the equipment you choose can be the difference between a safe shift and a serious accident. Yet many employers still treat scissor lifts and boom lifts as interchangeable. They’re not. Scissor lifts offer controlled vertical access. Boom lifts introduce reach and maneuverability. Each behaves differently on uneven surfaces, in congested areas, and near overhead obstacles. When those realities are overlooked, routine tasks can turn into avoidable emergencies. This blog breaks down the safety advantages and limitations of both lift types, so you can match the machine to the job, protect your crew, and keep your operations moving without unnecessary risk. What is Scissor and Boom Lifts? When it comes to elevated work platforms, understanding the differences between boom & scissor lifts isn’t just semantics; it’s about matching the right machine to the task, ensuring worker safety and operational efficiency. Let’s first discover how each lift type appears & functions: Scissor lifts raise workers straight up using an “X”-shaped crisscross mechanism that extends vertically. They feature larger, stable platforms ideal for multiple workers and tools, making them best suited for indoor tasks or flat, even surfaces. Boom lifts, on the other hand, can extend both vertically and horizontally using an articulating or telescopic arm. Mounted on a mobile base, they offer superior reach and maneuverability, perfect for outdoor jobs, uneven terrain, or work around obstacles and structures. What are Scissor Lift Safety Strengths, Limits, and Ideal Use Cases When managing elevated‑work operations, choosing the right equipment isn’t just a cost decision; it directly affects worker safety, site productivity, and your liability. Where Scissor Lifts Offer the Highest Safety Advantage Scissor lifts shine when your work is vertical, concentrated in one zone, and you’re on a stable, level surface. Their large platform deck offers plenty of room for multiple workers, tools, and materials, reducing the risk of over‑reaching or shifting loads. They move straight up and down, which simplifies operator training and site setup. Because the platform remains within the footprint of the machine, the center of gravity is fixed, and you get better inherent stability compared to machines that extend far out. Scissor lifts offer safer, simpler operation in warehouse maintenance, indoor ceiling work, or any task involving multiple workers and tools in one area; minimizing outreach-related tipping risks. Common Hazards Linked to Scissor Lifts Even with their safety strengths, scissor lifts carry specific hazards you must manage directly: Tip‑overs and instability: Using a scissor lift on uneven ground, slopes, holes, or soft soil dramatically increases risk. Wind gusts during outdoor use can easily destabilize the platform. Overloading and unbalanced loads: If the platform exceeds its rated capacity or you distribute weight poorly (many workers on one side, heavy toolboxes, materials hanging), you compromise the mechanism and raise the risk of failure or tipping. Falls and guardrail misuse: Falls and guardrail misuse: Although scissor lifts typically use guardrails rather than full body-harness systems, incidents still occur when operators lean or climb over the rails or work outside the platform boundary often due to inadequate fall protection training. Employers should ensure workers are properly trained in fall prevention and equipment use through certified programs such as Fall Protection Training Course. Crushing, entrapment, and collisions: Being near moving equipment, tight spaces, overhead beams, or power lines can lead to the lift being struck or the operator being pinned. Electrocution and overhead hazard: Operating near power lines or touching overhead structures, especially when elevated, exposes the platform to arcs or electrical conduction. Worker Skill Level Required Operating a scissor lift requires formal training and certification. While scissor lifts are generally easier to control than boom lifts, OSHA (29 CFR 1926.454) mandates that only trained and authorized personnel operate them. Training must cover hazard recognition, safe operation procedures, load capacity limits, and fall protection practices. Employers are responsible for ensuring operators complete this training before use and receive retraining whenever new equipment, hazards, or performance issues arise. By understanding these limits, you as an employer can plan accordingly. Opt for scissor lifts where they can keep your teams safe. What are Boom Lift Safety Strengths, Limits, and Ideal Use Cases When elevated work requires more than just vertical motion, the lift you choose becomes a critical safety decision. Where Boom Lifts Offer Better Safety Than Scissor Lifts Boom lifts excel when your job demands reach over obstacles, horizontal extension, or high elevation. Because they can extend both vertically and horizontally, they allow you to position workers precisely without forcing them to lean dangerously or rely on unsafe workarounds. For tasks like façade repair, rooftop inspection, utilities maintenance, or tree work, a boom lift provides flexibility, access, and fewer repositioning delays. Worker Skill Level Required Operating a boom lift requires advanced skill. Operators must manage horizontal reach, understand load distribution while the lift is articulated, and monitor stability during out-of-vertical use. Employers should assign experienced operators to boom lift tasks and ensure their training covers these additional variables to maintain safe operation. High-risk Situations Specific to Boom Lifts Despite their reach and flexibility, boom lifts bring distinct hazards that must be managed. The machine’s stability margin can shrink when reaching far from its base or when the ground isn’t level. Other risk factors include: Over-reaching or lateral extensions may bring the platform into contact with power lines, structure projections, or overhead hazards. Smaller platforms and lower load capacity mean boom lifts often carry fewer workers/tools, increasing the need for precise planning of loads and platform use. Outdoor use, higher heights, and exposure to wind or uneven terrain amplify the severity of a mistake. By recognizing when a boom lift’s strength aligns with the task and when its exposure calls for extra control, you can make an informed decision about which lift type to use. Conclusion: Choosing the right lift for the job isn’t just about equipment; it’s about protecting your people and keeping your site running smoothly. Understanding when to use a scissor lift versus a boom lift helps you avoid costly mistakes and serious injuries. Taking the time to train your team properly pays off in safety and productivity. Invest in the right knowledge today and give your team the tools to work safer tomorrow. References: Atlantic Forklift Services, Scissor Lifts vs. Boom Lifts: A Comparative Analysis, https://www.atlanticforkliftservices.com/scissor-lifts-vs-boom-lifts-a-comparative-analysis/ Scissor Lifts, April 13, 2025, The Ultimate Stability Guide: Comparing Boom Lifts and Scissor Lifts, https://scissorlifts.org/the-ultimate-stability-guide-comparing-boom-lifts-and-scissor-lifts/ ipaf, IPAF Global Safety Report 2025, https://www.ipaf.org/en/gsr2025 .fancy-line{width:60%;margin:20px auto;border-top:2px solid #116466;text-align:center;position:relative}.fancy-line::after{content:"✦ ✦ ✦";position:absolute;top:-12px;left:50%;transform:translateX(-50%);background:white;padding:0 10px;color:red}

Read More
TOP 10 OSHA Training Providers" title="TOP 10 OSHA Training Providers

The Truth Behind “Top OSHA Training Provider” Lists — Why Big SEO Machines Dominate Search, Not Quality

The Truth Behind “Top Safety Training Provider” Lists — Why Big SEO Machines Dominate Search, Not Quality Most “top” lists are SEO filler written by affiliates, not evaluations of accreditation, content quality, or ownership transparency. By Beth Holsten · Updated Nov 9th, 2025 In today’s crowded safety-training market, a simple search for “Top Safety Training Providers” returns the same names again and again: 360Training, ClickSafety, AdvanceOnline, RedVector, HSI, and others. What most people don’t realize is that these lists are rarely compiled by regulators or industry experts. They are SEO-driven articles created by affiliate marketers to feed ad funnels for a handful of large corporate networks. The Hidden Web of Ownership Behind what looks like variety, the industry is consolidated under a few major holding groups: 360Training.com, Inc. — owns OSHAcampus, OSHA.com, AdvanceOnline, Learn2Serve, HIPAAExams, and more. Vector Solutions — owns ClickSafety, RedVector, TargetSolutions, and SafeSchools. Certus — controls OSHA Education Center, StateFoodSafety, TPC Training, Notaries.com, and Metrix Learning. HSI (Health & Safety Institute) — backed by private equity, owns Summit Training Source, CLMI, EMS Safety, and Vivid Learning Systems. UL Solutions — powers OSHAOutreachCourses.com and other branded portals. What appears to be ten different providers is often one corporation operating multiple brands, amplified by paid search and affiliate content. SEO Over Substance These ranking pages tend to reward domain age, backlinks, and ad spend—not the quality or completeness of the training. They rarely ask: How often is the content reviewed and updated? Does the training reflect state-level requirements, or only a generic federal baseline? Is the curriculum authored and maintained by real compliance professionals, or resold through affiliate channels? Important: Many companies are unaware that state-level regulations can exceed federal requirements. Buying “baseline” training may leave real compliance gaps. The Rise of Spammy SEO Practices Another problem is the proliferation of duplicate domains and spammy sites designed solely to capture search traffic. For example, domains branded to resemble official institutions may simply be marketing shells for larger training conglomerates. How This Hurts the Industry When marketing dollars outweigh merit, it becomes almost impossible for independent safety training companies — many of whom are deeply committed to compliance, bilingual accessibility, and real-world hazard education — to compete. The result is a market flooded with generic courses, duplicated material, and minimal differentiation. This undermines the very purpose of safety education: to save lives, prevent injuries, and ensure workers are genuinely prepared for hazards. True compliance training requires instructors who understand both federal frameworks and local enforcement variations, not outdated content or templated slides produced for affiliate profit. Where HAZWOPER OSHA Training Stands Apart HAZWOPER OSHA Training LLC (Industrial Certified Training) avoids affiliate marketing tactics and focuses on substance: Accurate, regulation-aligned content authored and routinely updated by qualified instructors. Coverage of state-level and industry-specific standards, not just federal minimums. Bilingual (English/Spanish) delivery for real-world adoption. HAZWOPER, DOT, EPA, NFPA and other regulated programs built in-house. Private-label LMS and SCORM licensing for enterprises focused on accountability over advertising. Transparent certification and data tracking via a first-party LMS—no resellers. A Turning Point: Search Engines vs. Real Expertise As traditional search dominance wanes—with AI tools like ChatGPT changing how people discover and evaluate providers—the reliance on paid SEO is losing power. Algorithms are increasingly valuing expert-authored, fact-based content over keyword stuffing and backlink farms. That shift benefits authentic, compliance-focused companies like HAZWOPER OSHA Training and Lion Technology, whose credibility is earned through expertise—not ad budgets. The Bottom Line Before trusting any “Top Safety Training Providers” article, ask: Who wrote it? Who profits from it? Does the provider truly understand the regulations behind the training—and keep content updated? Real safety training is built on credibility, transparency, and depth of knowledge—not marketing spend. That’s why HAZWOPER OSHA Training continues to focus on what matters most: authentic, up-to-date, industry-relevant safety education. Need enterprise-grade safety training? Ask about bilingual courses, private-label LMS portals, SCORM licensing, and custom curriculum for your industry. info@hazwoper-osha.com · 866‑429‑6742
Read More
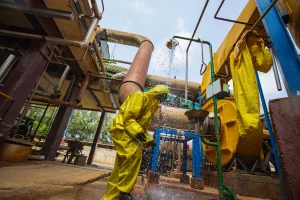
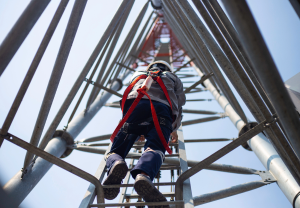
A worker standing on a ladder.

When Should You Stop Using a Ladder – And Switch to a More Stable Platform (Scaffolding, Aerial Lift)?

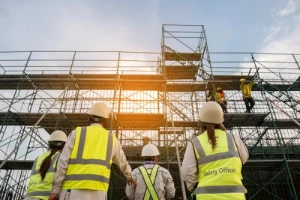
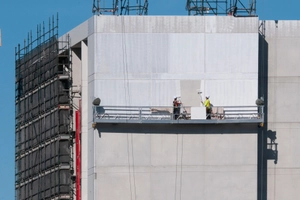
When Should You Stop Using a Ladder – And Switch to a More Stable Platform (Scaffolding, Aerial Lift)? Introduction: A single misstep on a ladder or scaffold can trigger a chain reaction, an injured worker, halted operations, and a costly compliance investigation. For organizations that rely on work at height, such scenarios are all too familiar. Falls remain one of the most persistent and costly hazards in construction and industrial environments. In 2023 alone, the U.S. construction sector recorded 421 fatal falls, accounting for nearly 40% of all construction fatalities. Similarly, in the UK, fatal falls from height increased by 22% in 2023/24 compared to the previous year, a troubling sign that incidents are trending upward rather than down. Despite the clear risks, many organizations continue to overlook fundamental safety practices. Ladders are often used by default rather than by design; scaffolding inspections are inconsistent, and aerial lift procedures are frequently misaligned with actual site conditions. These gaps can turn routine work into a high-risk activity. This blog brings together essential guidance on ladder safety, scaffolding safety, work-at-height practices, and aerial lift operations, providing practical insights to help you choose the right equipment, comply with regulatory standards, and create a safer, more efficient job site. What are the Common Fall Hazards While Working at Heights? Workers performing jobs at height face serious risks whether they’re using ladders, scaffolding, rooftops, or aerial lifts. Falls often result from a combination of factors such as inadequate training, poor equipment maintenance, lack of proper fall protection, or unsafe work practices. In this section, we’ll draw on recent research and industry data to highlight the most common hazards associated with working at heights and what employers and workers should watch out for. 1. Unprotected edges, openings and leading edges Hazards that are frequently overlooked include: edges without guardrails; unsecured skylights; openings in floors or rooftops; and unmarked drop-off zones. According to the Bureau of Labor Statistics, in 2023, around 64% of fatal falls to a lower level in U.S. construction occurred from heights between 6 and 30 feet, a range that may seem “low” but still leaves workers vulnerable before they reach what are traditionally considered high-rise heights. 2. Poor or Inappropriate Access Methods Using a ladder for a job that requires scaffolding or an aerial lift greatly increases the risk of a fall. The same applies when workers use equipment not designed or rated for the specific task. Each access method has limits, ignoring them often leads to instability and accidents. Proper planning before work is essential. According to a survey by CPWR – The Center for Construction Research and Training, job sites with poor or incomplete planning were 71% less likely to have workers use fall-protection systems. This shows how preparation directly influences safety compliance. 3. Weak or unsteady surfaces and platforms Roof panels, skylights, temporary decks, platforms on aerial lifts and mobile scaffolding positioned on sloping terrain are examples of surfaces that may collapse under the workers weight or simply fail. The use of fragile materials and unstable surfaces are one of the causes of incidents on elevated tasks. 4. Lack of Fall Prevention Gear Employers frequently overlook fall protection planning, and workers often skip the use of required fall protection gear. This includes harnesses, guardrails, secure anchor points, safety nets, and toe-boards. 5. Environmental and Site-Related Hazards Dynamic Hazards Environmental factors such as poor lighting, rain, ice, and strong winds can quickly turn elevated work into a high-risk situation. These conditions reduce visibility, make surfaces slippery, and affect a worker’s balance and stability. In addition to weather and lighting, site-related hazards such as unsecured tools, unstable materials, or objects dropped from height also pose serious risks. These dynamic conditions change throughout the workday, creating unpredictable fall hazards. UK data for 2023/24 shows a 22 % increase in fatal falls due to these combined circumstances. 6. Human factors: Fatigue, Complacency, Lack of Training Even the best equipment can’t prevent falls caused by human error. Fatigue reduces focus and balance. Complacency during short or routine tasks leads to skipped safety steps. Lack of training leaves workers unaware of hazards or proper equipment use. These factors often combine, making “routine height” falls among the most common and serious workplace injuries. Identifying hazard categories is the first step. What matters is embedding a decision framework that ensures the right access choice is made, the right equipment is used, inspections are performed, and everything is documented. Practical checklists and decision tools to simplify these tasks will be discussed in the next section of this blog. When to Stop Using Ladder? A ladder should never be used if a risk assessment shows it’s unsafe or impractical for the task. “Unsafe” means the ladder cannot remain stable, support the load, or allow workers to maintain three points of contact. “Impractical” means the task duration, height, or conditions exceed what a ladder can safely handle. Stop using a ladder and switch to scaffolding or an aerial lift if: The task takes too long or requires heavy tools. Ladders are for short-duration work, generally less than 30 minutes per setup. The ladder shifts or sways when positioned at height, reducing stability. The task forces overreaching or working near unprotected edges, breaking the three-points-of-contact rule (two hands and one foot, or two feet and one hand). The ground or surface is uneven, unstable, or slippery, making it impossible to secure the ladder properly. Weather or environmental conditions are unsafe, such as rain, wind, ice, or proximity to electrical hazards. The ladder’s load capacity or duty rating is exceeded, including the combined weight of the worker, tools, and materials. The ladder shows signs of damage, such as cracks, loose rungs, or bent rails. If any of these conditions occur repeatedly, the ladder is unsuitable as a primary work platform and should be replaced with a safer access method. What are Alternatives to Ladder? When a ladder is no longer the safest option for the task, evaluate alternative access methods such as scaffolds, aerial lifts, or work platforms that provide greater stability and protection.The following are safe alternatives to ladder: Scissor Lifts or Mobile Work Platforms: These help in vertical and horizontal movements with guardrails. Their stable bases and controlled movement systems ensure workers maintain secure footing during both vertical and horizontal positioning. Supported or Suspended/Mobile Scaffolding Tower: On scaffolds, workers can stand safely for long hours while carrying tools and equipment. Workers can also move laterally on them while maintaining their balance. Aerial or Boom Lifts: Aerial and boom lifts are a good choice for tasks at substantial heights or when reach and mobility are needed. Their basket or cage design provides enclosed footing, reducing the chance of falls even during elevated or angled work. Permanent or Semi-Permanent Access Systems: Includes fixed platforms such as guardrail-protected mezzanines, and stair towers. They are suitable when height access is frequent and long-term. Work Positioning from Ground/Remote Tooling: Whenever possible, use tools and equipment that allow work to be performed from the ground, such as extendable handles, telescopic tools, or robotic systems. These approaches eliminate height exposure altogether. With the help of these ladder alternatives, employees can reduce the fall risks significantly. What are Scaffolding Requirements and How to Prevent Scaffold Collapse and Falls? OSHA’s scaffolding standard (29 CFR 1926.451) lays out core safety requirements every worksite must follow, and most of them tie directly to simple, practical steps that prevent collapses and falls. Start with a solid foundation. Scaffolds must rest on a firm, level surface and be equipped with base plates or mud sills if the ground needs extra support. This helps ensure the structure can support its own weight plus at least four times the maximum intended load, as OSHA mandates. Next, stability is everything. Proper bracing, guying, or tying is essential, especially when the height-to-base-width ratio exceeds 4:1. A stable structure keeps scaffolds from swaying or tipping under load or wind pressure. Platforms should be fully planked or decked, with a minimum width of 18 inches to give workers a secure footing and reduce trip or slip risks. Once the work platform rises more than 10 feet above the ground, OSHA requires guardrail systems or personal fall-arrest equipment; both must be in place and used correctly. A “competent person” should always oversee scaffold erection, modification, and dismantling, as well as perform inspections before each shift and after any event that could affect stability, such as severe weather or an impact. Finally, never overload or misuse scaffolding components. Each part of the system is designed for a specific purpose, and staying within those limits is key to maintaining safety and compliance. How to Use Aerial Lifts Safely? Pre-use inspection and safe operation of aerial lifts Before every shift, operators must conduct a thorough pre-start inspection of the aerial lift to confirm it’s safe to use. Key items include checking vehicle components such as fluid levels, wheels/tires, steering/brakes and alarms, plus lift components like emergency controls, outriggers, locking pins, stabilizers, structural members, and guardrail systems. Safe operation also means adhering strictly to the manufacturer’s load-capacity limits, ensuring the brakes and outriggers are properly deployed on firm surfaces, and never moving the lift with the boom elevated unless designed for that purpose. Work-zone hazards (uneven ground, holes, overhead power lines, wind, debris) must also be assessed and eliminated prior to use. Essential Fall Prevention Equipment and Proper Tie-Off Techniques If employees are working from an aerial lift, fall protection isn't optional; it's required. Employees need to wear a full-body harness with a lanyard that's attached to the boom or basket's designated anchor point. And here's what's important: attach it to the lift itself, not to nearby structures or poles. Keep access gates or openings closed while working. Employees should always stand firmly on the platform floor. Avoid climbing on the rails or try to use planks or ladders inside the basket. And make sure the guardrails stay intact. These simple steps can save lives. Training isn't just a formality; it's required. Every operator needs to understand the real hazards they face, such as electrocution, tip-overs, and being thrown from the lift. That’s why OSHA-compliant Aerial and Scissor Lift Safety Training is essential to ensure workers are properly equipped to recognize risks, operate lifts safely, and prevent costly accidents on site. How to choose the right access method (ladder, scaffold, or lift)? Selecting the right access method isn’t just about convenience; it’s about safety, efficiency, and the nature of the task at hand. The wrong choice can increase the risk of falls, strain injuries, or even equipment failure. Before you decide, take a moment to assess the work environment, duration, and required mobility. 1. Choose the Safest and Most Efficient Access Method Ladders are best suited for short-duration tasks at lower heights where workers use minimal tools and don’t need to move much laterally. Scaffolds provide a stable, spacious platform for extended work periods, especially when multiple workers or heavier materials are involved. Aerial lifts are ideal for jobs that require frequent repositioning, access to multiple elevations, or operation over uneven ground. 2. Evaluate the Surface, Stability, and Hazard Factors Physical Stability: Start by assessing the ground and structural support. If the surface is uneven, soft, or unstable, avoid using ladders altogether. Scaffolds should always rest on firm, level ground with base plates or mud sills to distribute weight evenly. For aerial lifts, ensure the tires or outriggers are properly positioned and locked before elevating the platform. Remember, no access method is safe if its foundation isn’t secure. Environmental Factors: Next, consider the surroundings and the weather. Overhead power lines, hanging structures, or nearby obstructions demand extra clearance and proper fall protection, regardless of the equipment used. Strong winds, rain, or icy conditions can make elevated work risky, especially on scaffolds or ladders, where footing can easily be compromised. In such cases, an aerial lift with proper stabilization and weather-rated controls may offer a safer alternative. 3. Match Workforce Size and Tool/Material Needs The number of workers, the type of tools, and the amount of material being handled all influence which access method is the safest and most efficient. Choosing equipment that fits the scope of work prevents crowding, overloading, and unnecessary risks. Ladder: Ideal for quick, light tasks performed by one person such as changing light fixtures, inspecting equipment, or minor touch-up painting. Ladders are best when minimal movement and tools are involved. Scaffold: Perfect for larger projects where multiple workers need room to move and handle tools or materials, such as exterior wall repairs, masonry work, or painting over extended areas. The wider platform provides stability and a shared workspace. Aerial Lift: Best suited for elevated tasks that require mobility and access to various points, such as electrical maintenance, HVAC installation, or warehouse overhead inspections. However, workers must always confirm the lift’s load capacity and platform dimensions before operating. 4. Consider Setup Time, Cost, and Duration of Use Think about how long the job will take and what makes sense budget-wise: Ladders are the quickest to set up and the cheapest option, but they're limited in what they can handle. Scaffolds take longer to put up and take down and cost more upfront, but they're worth it when employees are working for extended periods or need to cover a wider area. Lifts fall somewhere in the middle for setup time and mobility, and they're great for work that involves changing heights or moving between locations. 5. Ensure Compliance, Training, and Fall Protection Requirements Every access method comes with its own training and safety requirements: Ladders have simpler training requirements, but employees still need to follow safe-use rules and avoid exceeding safe limits. Scaffolds must comply with OSHA standards for supported or suspended structures, include properly installed guardrails, and always be assembled, used, and inspected under the supervision of a competent person. Aerial lifts require formal operator training, and their inspection and fall protection requirements are more rigorous than those of the other options. Conclusion: Choosing the right access method isn’t just about finishing the job; it’s about making sure everyone goes home safe at the end of the day. Whether it’s a quick repair or a big construction project, knowing when to use a ladder, scaffold, or lift can make all the difference. The safest worksites are those where workers understand their equipment, follow good practices, and feel confident in every step they take. If your team works at height, the right training can make your job safer and your career stronger. References: OSHA, OSHA's Fall Prevention Campaign, https://www.osha.gov/stop-falls? Project Safety Journal, 28.08.24, Increase in work-at-height deaths shocks industry, https://projectsafetyjournal.com/increase-in-falls-from-height-deaths-shocks-industry/ .fancy-line{width:60%;margin:20px auto;border-top:2px solid #116466;text-align:center;position:relative}.fancy-line::after{content:"✦ ✦ ✦";position:absolute;top:-12px;left:50%;transform:translateX(-50%);background:white;padding:0 10px;color:red}

Read More
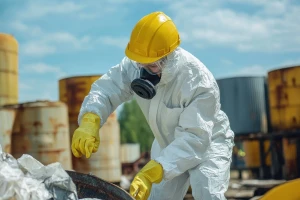
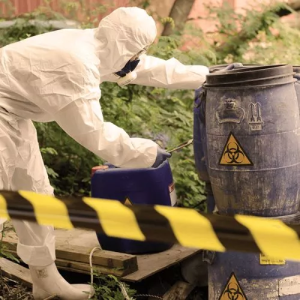
An employee standing near the hazardous waste dump

What Waste Minimization Techniques Cut Costs and Improve Compliance?

What Waste Minimization Techniques Cut Costs and Improve Compliance? Introduction: Recent studies revealed thousands of tons of toxic waste from US landfills are polluting groundwater and soil. Scientists also found that each year, more than 16,500 pounds of PFAS (per-and polyfluoroalkyl substances) are dumped in landfills. Apart from adversely affecting the environment, waste substances create a serious compliance and financial burden for employers. Consider the incident that occurred due to the negligence of Clean Harbor’s Environmental Services Inc at a customer’s facility. They failed to properly ventilate the confined space containing hazardous waste, and it resulted in a worker’s fatality. The company was given more than $602,000 in penalties. Mismanagement of waste leads to financial penalties, cleanup liabilities, and reputational damage for businesses. Therefore, the adoption of waste minimization techniques is essential for businesses. By enhancing production processes, refining material reuse, and training employees, waste can be significantly reduced. This blog will shed light on the most effective waste reduction techniques that assist businesses in reducing waste at source and reinforce compliance. What is Waste Minimization? Waste minimization in the workplace involves much more than just the responsible disposal of waste. It takes a more proactive approach to reduce or eliminate waste before it is created. Waste minimization methods involve activities that reduce the volume or cut the degree of hazardous and non-hazardous solid waste a facility generates before it is treated, stored, or disposed of. It includes source reduction and environmentally appropriate recycling activities. Core Objectives Effective waste management begins with a proactive approach that minimizes environmental impact and promotes sustainable operations. To achieve this, employers should focus on the following core objectives: Source Reduction: Prevent waste at the outset. For example, modifying manufacturing steps so fewer raw materials are wasted. Toxicity Reduction: Replace hazardous substances with less harmful alternatives so that any waste produced is safer to handle and less risky. Recycling / Material Reuse: Reclaiming waste so it serves as input for processes rather than being discarded. On-site reuse or working with partners to recycle materials are key. How to Conduct Waste Audit at Worksite? The first step in the implementation of a waste minimization plan is to analyze the existing workplace waste. A detailed audit of waste helps employers to pick out compliance gaps, inefficiencies, track disposal, and other factors. This step helps gather concrete data that helps organizations manage environmental and financial risks. Also, with this process, you can generate insights required to set measurable goals to reduce and recycle waste. With the help of accurate data, employers can prioritize areas that have the greatest impact on cost savings and sustainability performance. Step 1: Assess Waste Sources: Start by reviewing all operational areas in your unit/facility, from admin offices to production floors. This will give you an idea of where and how waste is generated. Review inventory and purchasing records to check for over-ordering and material inefficiencies. Check thoroughly all waste collection points and disposal bins. This helps in evaluating what is being discarded. Chat with supervisors and crew to pick out recurring causes of waste, such as material damage, overproduction, and errors in process. Inspect and record disposal frequency and cost data to check high-expense and high-volume waste streams. Step 2: Categorize and Measure Waste The next step is sorting out waste into distinct categories to recycle, reuse and reduce. Segregate the waste into four main categories, including hazardous, recyclable, municipal, and degradable. Weigh quantities of each category to check their contribution to the total waste volume. Calculate the reusability of hazardous materials. Identify and pick out materials that can be reprocessed, resold, and substituted. With the help of this categorization, you can get clarity on areas that need improvement. After this clarity, suitable disposal methods can be aligned. Step 3: Set Baselines and Realistic Goals Use your data to figure out where you're starting from (your current waste levels) and set some realistic targets you can actually achieve. For example: Look at ways to redesign processes or swap out materials to cut down on hazardous waste. Get better at sorting waste so you can recycle more. Work with your recycling vendors to bring down disposal costs. Aim for something concrete, like reducing your total waste by 10 to 15% over the next year. Step 4: Track Progress and Refine Once you've got your goals in place, keep an eye on how things are going and make changes when you need to. Use your audit data to see if you're making progress, update your benchmarks, and fine-tune your approach to work more efficiently. When you track things consistently, you'll stay compliant, save money, and create a workplace culture where people naturally think about waste reduction in their daily work. What are the Practical Waste Minimization Techniques for Worksite? For effective waste minimization, employers should have actionable strategies that can be implemented immediately. Given below are four practical techniques that are used to reduce waste, streamline operations, and meet environmental standards. 1. Source Reduction It prevents waste production altogether. It is the most effective and expense-saving method employers can use. Reducing waste at the source can be done by: Smarter workflows: Reassess each stage of your operational process to pinpoint unnecessary material use and thriftless steps. Purchasing Efficiency: Only buy required materials and prefer those with minimal packaging and longer shelf life. Shifting to Safer Materials: Swapping toxic and short-lived chemicals with safer and durable alternatives. Waste reduction at origin helps employers to cut costs. It is also helpful in reducing risks attached to handling and disposal of hazmat. Overall, this approach is effective in ensuring compliance with OSHA and EPA's waste management standards. 2. Process Optimization Minor inefficiencies in production and workflow in industries can result in huge amounts of waste production. With the help of process optimization, existing systems can be improved for better material utilization, lesser downtime, and elimination of excess waste. Key methods of process optimization: Work Procedures Standardization: Ensure consistent work practices to reduce errors and material rejection. Regular Equipment Maintenance: Maintained equipment has lesser leaks, defects and malfunctions that generates waste. Executing Real-Time Monitoring Systems: Real-time systems such as sensors and IoT based tools help in resource tracking and identification of inefficiencies. Employee Training: Training workers so they can recognize waste and stick to optimized procedures helps as well. By optimizing processes, you not only improve productivity but also reduce costs, save energy and ensure compliance with environmental safety standards. 3. Lean Manufacturing Principles It is a structured approach that helps in reducing waste by increasing efficiency. It is devised on the idea of producing more value with lesser resources. Lean manufacturing is best for employers who want to sustain long-term waste reduction. Core Lean strategies include: "7 Wastes" Identification: The "7 Wastes" (Muda in Lean Manufacturing) These are the common on-value adding activities that drain time, materials, and resources without improving customer value. Recognizing them helps pinpoint where productivity is being lost and where processes can be streamlined. The 7 Wastes include: Overproduction Waiting Excess Inventory Unnecessary Transport Over processing Motion Defects Ongoing Improvement (Kaizen): Kaizen, a Japanese term meaning “change for the better,” Kaizen is a principle and approach used to continuously improve processes that may also include waste minimization techniques. Employee Empowerment: Frontline workers often spot waste earliest; encourage their input through suggestion systems, daily huddles, or improvement teams. Acting on their feedback speeds problem-solving and creates ownership of continuous improvement. Value Stream Mapping: A visual walkthrough of every step in a process (from inputs to delivery) to reveal wasteful or redundant activities. It highlights where time, materials, or effort add no value, so you can prioritize targeted fixes. Why Waste Minimization is Important for Employers Here are why waste minimization techniques are critical for employers: 1. Cost Reductions and Improved Efficiency When companies waste less raw materials, they ultimately reduce the costs associated with buying materials. Less disposal waste translates to lower disposal costs. Process efficiency also increases because there is less disruption and rework. 2. Regulatory Compliance In the U.S., waste management is governed by federal laws such as the Resource Conservation and Recovery Act (RCRA), enforced by the EPA, with states operating authorized programs or additional rules. Non-compliance can lead to fines, enforcement actions, permit changes, or facility shutdowns. Implementing waste-minimization measures reduces the risk of exceeding regulatory thresholds and the associated legal and financial consequences. 3. Improved Safety and Reduced Liability Using safer materials and generating less hazardous waste directly lowers the risk of worker exposure, workplace accidents, and environmental contamination. It also helps protect ecosystems and public health while reducing the organization’s legal and financial liabilities linked to spills, emissions, and improper waste handling. 4. Stronger Corporate Reputation and Stakeholder Trust Public concern for environmental responsibility is growing among investors, customers, and communities. Demonstrating progress in waste minimization enhances a company’s reputation, provides a competitive edge in bids and contracts, and supports credible sustainability reporting all of which strengthen stakeholder confidence and long-term brand value. 5. Planning for a Sustainable Business With rising waste disposal costs and stricter environmental regulations, businesses face increasing pressure to manage waste more efficiently. Resource constraints and evolving carbon policies are also reshaping how organizations approach waste reduction, making proactive sustainability planning essential for long-term resilience and cost control. How to Build a Waste-Conscious Workplace Culture? A waste-conscious culture really starts with your people. As an employer, reduce waste by integrating waste minimization deeply into daily operations so that everyone within the organization minimizes waste. 1. Employee Training and Engagement Training starts with the basics: waste management, sorting, and recycling. Train employees with hands-on knowledge about how their daily actions add to waste generation and compliance. Regular refresher training also helps to remember concepts and accountability. To increase engagement, encourage people to participate actively through awareness drives and employee-led initiatives. 2. Accountability and Incentives Specific waste reduction goals should be set and monitored for each department's progress. Teams and departments that meet goals consistently should be monitored constantly with incentives and recognition. By connecting performance to concrete rewards, waste-conscious behaviors in teams can be achieved. Conclusion Waste minimization spans more than just an environmental responsibility, rather it is a strategic business advantage. By reducing waste at source, process optimization, and developing a waste-conscious culture, employers can reduce costs and stay compliant. To achieve these goals, a trained workforce is non-negotiable. That's why at HAZWOPER OSHA Training LLC we offer specialized courses. These include 40-Hour Hazwoper Training designed for workers in high hazard waste operations. Our 24-Hour Hazwoper Training is for workers who have limited exposure with waste. To stay updated teams can enroll in 8-Hour Hazwoper Annual Refresher Training. These course are available in flexible formats so you can choose your preferred way to get certified. .fancy-line{width:60%;margin:20px auto;border-top:2px solid #116466;text-align:center;position:relative}.fancy-line::after{content:"✦ ✦ ✦";position:absolute;top:-12px;left:50%;transform:translateX(-50%);background:white;padding:0 10px;color:red}

Read More
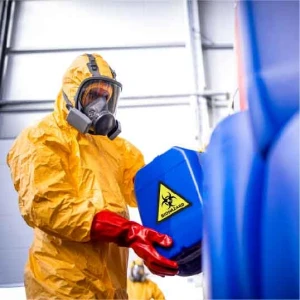
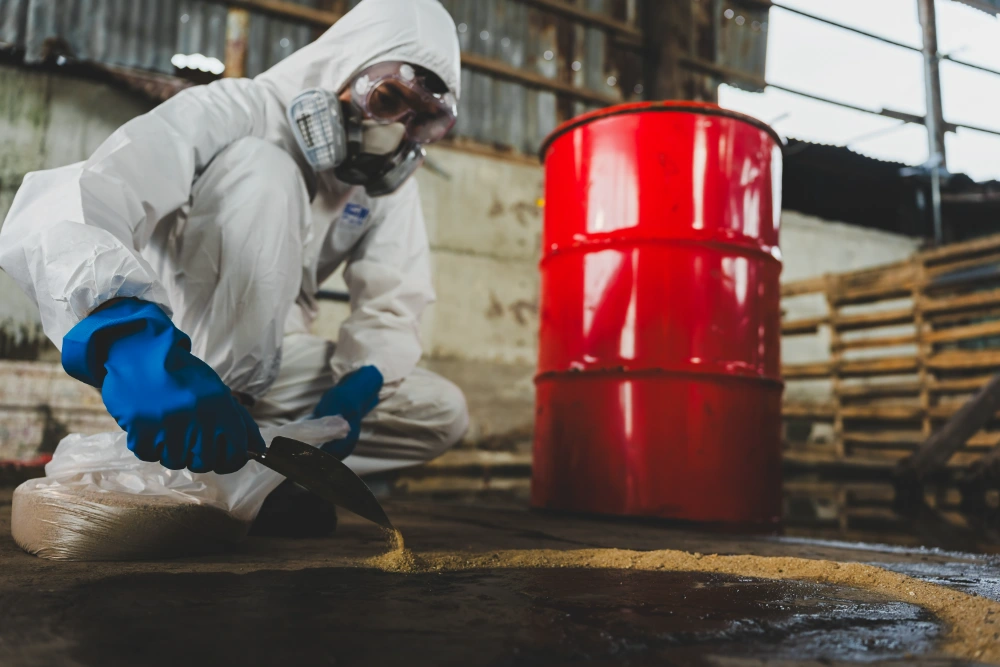
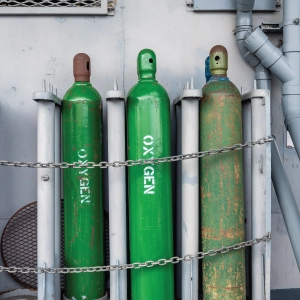
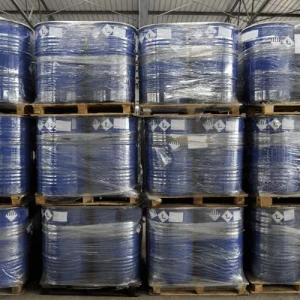
A worker standing outside with hazardous waste containers

What is the difference between Hazardous Materials and Hazardous Wastes?

What is the difference between Hazardous materials and Hazardous Wastes? Introduction: A “hazardous material” can quickly become “hazardous waste” and within this shift, trouble can arise if difference between the two is not understood clearly. This is the instance where the difference is not merely semantic. But has a much larger impact on the usage, storage, transport and handling of the respective substance. When hazardous materials are exhausted and serve no practical use, they become hazardous waste and should be aligned for careful disposal. Carelessness in the management of hazardous waste incurs damage to the environment, accidental exposure, and even costly fines. The 2024 Annual Fiscal report comments on this matter, saying, “In 2023, New York City had 3,033 hazardous materials incidents, 10% being the result of filthy, abandoned chemicals that were improperly stored.” This highlights the importance of understanding the difference between hazardous materials and hazardous waste. Understanding Hazardous Materials vs. Hazardous Wastes In every workplace, especially in industries like construction and manufacturing, hazardous substances play a vital role in daily operations. But understanding the difference between hazardous materials and hazardous wastes is crucial to keep the workplace safe. Both hazardous wastes and materials endanger worksite, but their purpose, nature, and handling requirements differ a lot. To understand this difference, let’s first define what qualifies as a hazardous material. What Makes Something a Hazardous Material? A hazardous material is any substance that could harm people or damage the environment. These materials might be toxic, corrosive, flammable, or radioactive. Workplaces use them all the time for cleaning, production, and keeping equipment in good shape. Because of the risks involved, every hazardous substance needs clear labels, proper storage, and safe handling practices. Common Examples of Hazardous Materials Here are some hazardous materials that are regularly used in workplaces: Fuels and oil keep vehicles and machinery running. Disinfectants and cleaning agents often contain corrosive or toxic ingredients that do the heavy lifting when it comes to sanitation. Pesticides and agrochemicals help control pests in agricultural settings. Chemicals like bases, acids, and solvents get used constantly in manufacturing. Every one of these materials can cause serious problems if someone spills them, mixes them incorrectly, or stores them in unsafe conditions. Why Industries Depends on Hazardous Materials? Hazardous materials aren't optional for most industries. Businesses depend on them to keep critical operations moving. Hazardous materials power chemical reactions on factory floors, keep machines running smoothly, and help maintain clean conditions where cleanliness can't be compromised. Disinfectants are a perfect example. Hospitals and food plants would struggle to meet basic hygiene standards without them. Fuels keep forklifts operating and delivery trucks on the road. Getting rid of hazardous materials completely just isn't realistic. What matters is how workplaces use them. That means storing materials the right way, training workers on proper handling techniques, and disposing of everything correctly. Done right, this approach keeps risks low and prevents waste problems down the line. How Materials Become Hazardous Waste Hazardous material becomes hazardous waste when it can no longer be used for its intended purpose and must be discarded. This happens when a substance gets contaminated through contact with substances and chemicals. A substance can also degrade due to exposure to light, heat, and air. Similarly, a substance can also expire or become chemically unstable due to different reactions. Now let’s understand how hazardous waste is generated. How Waste is Generated During Operational and Industrial Activities? Waste generation is a natural part of the operational cycle in industrial settings. Every process that mixes, uses, and alters hazardous materials produces a waste byproduct. For example, acid baths are used in metal finishing plants. Once acid neutralizes or contaminates, it turns into hazardous waste. Likewise, the solvent-based cleaning in maintenance and manufacturing operations produces waste residues that need a diligent disposal. In labs, expired and contaminated chemical reagents also turn into accumulated hazardous waste. By recognizing this cycle, employers can implement waste-reduction strategies in the workplace. Common hazardous waste examples Take a look at some common examples of hazardous wastes produced as a result of various industrial & commercial operations. Used solvents or paint thinners from cleaning and coating processes Discarded paints, adhesives, and resins that can no longer be applied safely Chemically contaminated, rags or gloves, and filters that were used Residues left in manufacturing tanks or containers that can emit harmful vapors If these wastes are not handled properly , they pose a serious threat to human life & the environment. What are the Key Differences Between Hazardous Materials and Hazardous Wastes? Below are some key differences between hazardous wastes and materials that will help you understand these more effectively: 1. Purpose and Lifecycle: A solvent used to clean machinery is hazardous in nature. But since it has functional & operational use, it needs to be managed like an asset and should be labelled & stored properly. Simultaneously, training employees carefully deal with hazardous materials helps in reducing potential risks. If this cleaning solvent becomes dirty, gets mixed with oil, or loses its effectiveness, it becomes a hazardous waste and loses its status as an operational resource. It now requires different containment, labeling, and disposal methods to avoid leaks and exposure. 2. Storage and Handling Requirements Labeling, Containment, and Segregation Differences On the other hand, hazardous wastes need secondary containment, a clear labeling of ''hazardous waste'', and designated accumulation areas. Hazardous waste must be segregated by waste type (toxic, flammable, corrosive) to prevent any chemical reaction. Employers should also inspect the storage areas regularly to check out leaks. While handling hazardous materials, focus should be on how the material should be safely transferred and used without accidental contact or spillage. Whereas hazardous waste handling mainly involves the safe accumulation of disposal and containment of the substance. Workers who deal with active materials wear PPE to avoid direct contact, but those who manage wastes must stick to stringent containment and transport procedures. This prevents contamination and accidental mixing of incompatible substances. Risks and Exposure Potential Hazardous materials and hazardous wastes carry different kinds of risks depending on how people handle and store them. Hazardous materials create the most danger during active use. Splashes, spills, or vapors from these materials can lead to immediate exposure or start fires. Hazardous wastes work differently. The real danger builds up over time because wastes often contain mixtures of degraded substances that grow unstable. Air, moisture, or heat can trigger these wastes to release toxic fumes, eat through containers, or even react violently. Spent solvents can also pose serious risks after being used for cleaning or degreasing operations. They may contain residual oils, greases, and other reactive materials over time, and may become highly volatile. Contaminated solvents may also contain enough flammable materials to become dangerous when exposed to air or mixed with incompatible materials; and may include highly reactive acids, oxidizers, and other waste solvents. For the prevention of fire and workplace toxic exposure incidents, proper labeling, storage, and disposal of these wastes is vital. Why Distinguishing Between Hazardous Wastes and Materials Matters for Employers? Differentiating between hazardous materials and wastes is vital for employers to ensure a safe, and compliant workplace. Classifying the two properly can: Prevent accidents, expensive downtimes, and chemical reactions. Helps in reducing waste-related expenses and improving inventory control. keeps the environment safe and prevents contamination penalties. Reinforces safety-first culture that highlights work wellbeing, operational integrity, and environmental sustainability. Confusing these two categories has caused real problems, leading to enforcement actions and dangerous incidents. For example, in case of BioLab Inc. (Conyers, Georgia) a fire erupted at the facility in September 2024, sending toxic vapors into the air around the plant. When investigators looked into what went wrong, the issue came down to hazardous chemicals that hadn't been stored properly. OSHA came in and hit the company with four serious violations and two lesser violations. The fines came to more than $61,000. The Bottom Line By understanding the differences between hazardous waste and materials, worksites can stay safe, efficient, and compliant. Employers can help by offering specialized training that equips workers with the correct skills. For example, HAZWOPER 24-Hour and HAZWOPER 40-Hour Training offer basic and advanced directions to employees who handle hazardous substances. In contrast, OSHA HAZWOPER RCRA Hazardous Waste Management Technician Safety Training provides both hazardous material handling and waste management. For more particular roles, RCRA Hazardous Waste Generator Training allows proper waste identification, documentation, and disposal. With these training programs, employees can easily distinguish between hazardous waste and materials and work safely around them. References: Hazmat Annual Report, HAZARDOUS MATERIALS MANAGEMENT IN NEW YORK CITY, 2024 Annual Report, https://www.bers.nyc.gov/assets/dep/downloads/pdf/about/community-right-to-know/dep-hazmat-annual-report-2024.pdf .fancy-line { width: 60%; margin: 20px auto; border-top: 2px solid #116466; text-align: center; position: relative; } .fancy-line::after { content: "✦ ✦ ✦"; position: absolute; top: -12px; left: 50%; transform: translateX(-50%); background: white; padding: 0 10px; color: red; }

Read More
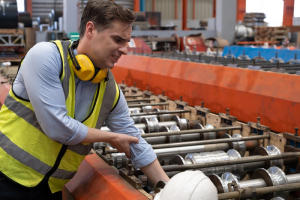
A worker aligning steel beams in the factory.

What Are the Top Hazards in Steel Erection and How Can You Mitigate Them

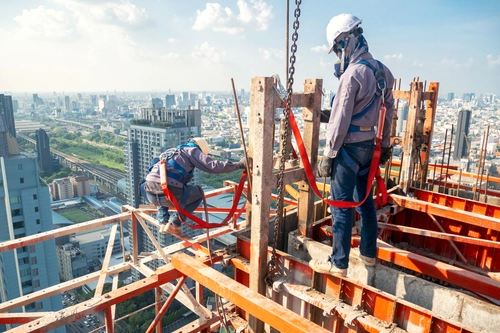
What Are the Top Hazards in Steel Erection and How Can You Mitigate Them? Introduction One of the most demanding and high-risk parts of any construction project is steel erection. A foreman calls out over the roar of clanging steel as an ironworker balances 100 feet above the ground, a wrench hanging from his belt, the wind tugging at his safety line. One slip or one missed signal could mean the difference between life and death. During steel erection, every step occurs at great heights and within short deadlines and has a razor-thin margin for errors. OSHA states that almost 35 steel erection workers die each year in the U.S.A, and a huge number of them suffer from devastating injuries. Not only workers, but also workplaces, get impacted by such incidents; as they disrupt timelines, increase expenses, and lead to costly penalties. Still, most of these incidents are avoidable. In steel erection, the actual challenge is in hazard identification, such as a lack of fall protection, unstable loads, and poor sequencing. In this blog post, we will discuss all the top hazards in steel erection work and how to reduce them. What are the Major Hazards in Steel Erection? Steel erection is one of the most dangerous jobs in construction. The statistics are sobering: OSHA data shows steel erectors die on the job at nearly five times the rate of other construction workers. Most assume that the biggest dangers are obvious, but that is not the case. An experienced ironworker may not be able to catch that a load is slightly off-balance. Similarly, mental fatigue isn't visible to the naked eye. And when things go wrong up there, they go wrong fast. Therefore, understanding the potential hazards isn't about employers checking boxes on a safety form. It's about making sure that employees make it home to their families. Here's what needs close attention: 1. Falls and Falls Through Opening The number one cause of fatalities in steel erection is falls. During steel erection, workers climb temporary ladders, walk on narrow beams, and work around unprotected edges. Other dangers are imposed by unsecured decking and floor openings. The most common violation we see is the absence of fall protection equipment. Consider the case of Sonny Steel Erectors in Houston. In February 2023, they got hit with $266,416 in fines after inspectors caught workers putting up buildings over 15 feet high with no fall protection. The company had been doing the same thing for twelve years. So, before the steel erection work begins, ensure that ladders, platforms, and walking surfaces are stable. Falls hazards (lack of existing anchor points, working from narrow surfaces, and working on leading edges) should be identified & fall protection equipment should be available & accessible for the workers. 2. Suspended Loads and Rigging Failures Uplifting steel members presents serious risks. With unsecured rigging, loads can slip, swing, and even drop. In fact, a minor misjudgment in load balance can easily cause the load to collapse and crush the worker. Jenna son's Steel Erectors violations case is a classic example. In February 2023, inspections on Jenna’s son Steel Erectors in Houston saw them incur fines of $266,416 after registering12 year violations of failure to provide fall protection while constructing buildings above 15 feet. Each time, citations would be written and left, only for OSHA officials to return and find the same violations in place over and over again. 50 steel workers were left to construct the buildings without protection for over 15 feet in the air. OSHA would leave, and the violators would continue their unsafe working conditions without any protection over time. Therefore, rigging equipment must be inspected thoroughly before starting work. Also, employees should be trained to step aside from suspended loads during lifting operations. 3. Structural Instability and Partial Collapse Partially erected structures lack stability. Lack of proper bracing and sequencing causes the frame to collapse or shift due to a single misstep. The erection plan should be made to ensure stability at every stage of the work. Also, workers should remove support only when connections are secured completely. Not being able to follow these stability measures can bring devastating outcomes, as observed in Big D Builders Case. In January of 2024, Big D Builders were imposed with $198,586 for the unnecessary collapse of a hangar, which resulted in the loss of 3 workers and left another 9 with injuries. The world of OSHA and 'Big D Builders’ found weak bracing for structural hangers, while improper placement of the structural guy wires, and placement of visibly curved i-beams, constructed and secured in a manner that anyone could visibly see the major hazards. The position of the cranes in mud and standing water left them completely exposed. 4. Falling Objects and Overhead Hazards Many objects, such as bolts, tools, and small parts, fall easily from heights. Overhead hazards and falling objects are a danger to those working on the ground. This danger amplifies with the presence of swinging loads, overhead cranes, and unsecured materials. Exclusion zones should be created below active areas. Tools should be tied together to prevent incidents caused by dropped objects. These days, when workers get hurt from a falling object, companies can expect to pay $10,000 to $15,000 per violation. 5. Environmental and Weather-Related Risks Rain, wind, snowfall, and low visibility can make a normal task a deadly one. Wind gusts destabilize the loads, and wet surfaces add to the risk of slips and trips. Weather conditions should be monitored regularly, and work should be planned accordingly. During unsafe conditions, high-risk tasks should be modified and postponed. Non-compliance with these precautions can lead to fatalities as seen in GL Construction's case. In April 2022, an employee at GL Construction in Wisconsin was killed when a 1,000-pound wall tipped over during a lift. The crew was working in Sun Prairie, trying to hoist the wall with a crane despite high winds. It should have been a straightforward job on a calm day. Instead, it became a tragedy. What makes this one so hard to accept is how easily it could have been avoided. The weather forecast showed high winds. All the company had to do was wait. They didn't, and someone died because of it. 6. Ergonomic and Material Handling Injuries Lifting, aligning, and carrying heavy steel components places significant strain on the body. Awkward postures and repetitive motions also cause long-term injuries. Workers should be offered mechanical assistance for demanding tasks. Tasks should be rotated to lessen the physical stress on workers. Hazard recognition alone is not enough. All risks and hazards lead to rigging failures, lost time, medical bills, and compliance actions. Falls are the number one cause of fatalities in steel erection, followed by ''struck by objects''. Audit the current hazards at your worksite and identify potential risks that are not being addressed or prioritized at the moment. What are the Under-Addressed Risks in Steel Erection? Most hazards in the steel erection sites are noticeable and known. But some risks and hazards go unnoticed and receive little attention. By ignoring these overlooked risks, you increase the likelihood of incidents at your worksite. Below are some overlooked risks that need attention as well. Fatigue and Other Human Factors Steel erection work has long hours and causes heavy physical strain for workers. Fatigue reduces alertness and reaction time. It also makes workers prone to judgment errors. Exhaustion signs should be watched, such as unsafe shortcuts, missed steps, and less awareness. Human factors, including low sleep, stress and lack of rest, also increase the probability of errors. Communication Gaps Miscommunication while sharing information and instructions causes mistakes to multiply. Workers might be unaware of when a load is about to swing. Foremen also miss the mark of changing wind conditions and unsafe structural shifts. Poorly communicated tasks often lead to more confusion among workers. Rescue Delays In case of an incident, the response time of rescue teams is pertinent. Delayed rescue impacts the outcome greatly. You will find that most worksites lack comprehensive rescue plans. Not only this, but, the teams lack the required equipment and training to perform a rescue effectively. Post-Incident Response Being ready to rescue workers is important, but it's really what happens next that can make all the difference. When someone gets hurt on the job, they need medical attention quickly, and the company needs to figure out exactly what went wrong and why. This means getting the injured worker out swiftly, providing first aid right there on site, and then sitting down to carefully piece together what happened. Every accident, as painful as it is, teaches us something. When employees and employers actually listen to those lessons and make changes, they create safer workplaces where fewer people get hurt in the first place. What are the Best Practices and Controls for Steel Erection Hazard? Reducing steel erection risks takes more than just good planning; it requires paying close attention to how the work actually happens on site. Take a look at some of best practices explained briefly below: 1. Engineering Controls and Safe Erection Sequencing Engineering controls are an essential part of safety during steel erection hazards. Engineering controls help keep structures stable during steel erection work. These include temporary bracing and built-in connection points to keep things stable as the structure takes-up shape. Similarly order of installation is vital as well. First, columns get anchored and beams go up. Then, bracing is added to each new piece. Temporary support is used until permanent connections are added and secured. Safe erection sequencing also plays an equal part while performing steel erection. Components must be installed in order to keep the integrity of the structure. This is done by adding anchoring columns before setting beams, and adding temporary bracing as the structure heightens. After final connections are verified, temporary support is removed. 2. Rigging, Load Planning, and Exclusion Zones Lifting heavy steel safely boils down to planning the lift carefully and making sure the equipment is in good shape. Before anything goes up, the crew needs to know exactly where to attach the load, what path it'll take through the air, and where it's going to land. Get those details wrong and the load can shift or swing in ways nobody expected. Keeping workers away from the area under a suspended load should be obvious, but it bears repeating. Tag lines keep the load from swinging around. Clear communication with the crane operator keeps everyone on the same page. These steps although basics prevent serious accidents. 3. Fall Protection and Rescue Preparedness If someone's working at a height, they need to be tied off. No exceptions! Full-body harnesses, lanyards, and guardrails give workers multiple layers of protection. But here's what a lot of people overlook that having the right equipment isn't enough. The crew also needs to know what to do if someone actually falls. Rescue readiness matters just as much as prevention. Workers need accessible rescue gear, and they need to practice using it. When an emergency happens, there's no time to figure things out on the fly. Regular drills make a difference between a fast response and a tragedy. 4. Preventing Dropped Objects and Overhead Risks Dropped tools and materials cause serious injuries. The fix is straightforward; secure everything. Tool lanyards keep wrenches attached to workers. Debris netting catches anything that does slip. Toe boards on platforms stop small items from rolling off the edge. Just like with crane work, workers need to keep people away from areas where there's overhead activity. Clear signs and exclusion zones make sure anyone who doesn't need to be there stays out of the danger zone. 5. Adapting to Environmental Conditions Nobody likes stopping work because of weather, but sometimes there's no choice. When the wind picks up or a storm rolls in, it's time to get people down. A gust at the wrong moment can knock someone off a beam or send a load swinging. And if workers can't see what they're doing because of fog, rain, or darkness, someone needs to bring in lights or call it off until conditions improve. Extreme heat and cold are just as dangerous. Ice and wet metal are slippery as hell, so non-slip coatings aren't optional. Shifting schedules to avoid the worst heat or cold isn't being soft; it's being smart. Heat exhaustion slows people down and clouds judgment. Frostbite is obvious. So, when workers are struggling with the temperature, they make mistakes. 6. Reducing Ergonomic Strain The smart move is to let machines do the heavy lifting whenever possible. Mechanical lifts, hoists, and cranes save backs, shoulders, and knees. When manual work can't be avoided, rotating tasks help spread the load, so the same person isn't grinding through the hardest job all day. Teaching proper lifting techniques actually matters. Also, workers should be given proper breaks as people get tired, and tired workers get hurt. 7. Strengthening Communication and Supervision Strong communication keeps people safe and keeps the job moving. Crane operators and ground crews need to stay in sync, whether that's through hand signals everyone understands or radios that actually work. A quick briefing at the start of each shift helps catch problems early. Site conditions change, new hazards pop up, equipment shifts around, weather rolls in. Daily check-ins make sure everyone knows what's different today. When something does go wrong, talk about it. Figure out what happened and why. That's how crews get better and stop making the same mistakes twice. The Bottom Line Steel erection is more than connecting beams; it is about protecting lives at hundreds of feet above ground. Every connection, lift and signal fault can have lifelong consequences. Steel erection comes with risks that generic safety training can't address. Workers need training built for the specific dangers they face every day. Falls kill more steelworkers than anything else. OSHA Competent Person for Fall Protection Training teaches crews to spot hazards and use harnesses and anchor points correctly. Structural problems during assembly get covered in OSHA Steel Erection Safety Training that teaches how to put steel together in the right sequence, so partially built structures don't collapse. Ergonomics Safety Training helps prevent back, shoulder, and knee injuries that come from lifting heavy loads and working in awkward positions for hours. When it comes to rigging and lifting, OSHA Competent Person for Basic Rigging and Inspection Training covers the essentials: inspecting equipment, controlling loads, and staying in sync with the crane operator. Because when you work at heights, safety is not an option. It is the foundation of keeping operations running smoothly. References: Occupational Safety and Health Administration, Steel Erection eTool, https://www.osha.gov/etools/steel-erection .fancy-line { width: 60%; margin: 20px auto; border-top: 2px solid #116466; text-align: center; position: relative; } .fancy-line::after { content: "✦ ✦ ✦"; position: absolute; top: -12px; left: 50%; transform: translateX(-50%); background: white; padding: 0 10px; color: red; }

Read More
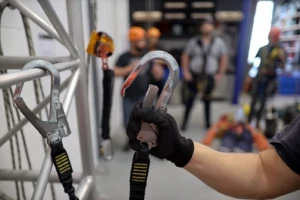
Clear image of a rigging equipment at a marine worksite.

What are the Different Types of Rigging Equipment You Should know?

What are the Different Types of Rigging Equipment You Should know? Introduction Improper rigging causes almost 60% of crane-related fatalities. In environments where material handling and heavy lifting are a major part of daily operations, the use of right rigging equipment is of the utmost importance. In the U.S, crane-related injuries lead to almost 42 fatalities per year. With expanding industrial projects and lifting operations, demand for reliable and efficient rigging equipment increases. The valuation of global rigging equipment is 30.87 billion USD in 2024. In this blog, we will cover the essential types of rigging equipment, such as slings, shackles, and lifting beams. We will also explain how these gears make load handling safe and more efficient. By understanding rigging gear types and uses, teams can cut down accident risks significantly. What are the Main Types of Rigging Equipment? Here we will explain the major types of rigging equipment for lifting, securing, and moving heavy loads. 1. Slings: Slings are flexible lifting devices that serve as a link between load and lifting equipment. They help to lift, hold, and move heavy objects safely and securely. Slings come in the following types: Wire Rope Slings: These slings are made from steel wires and are twisted into ropes. They are strong and durable. Wire rope slings are perfect for heavy-duty lifting work. Chain Slings: Made from metal chain, these slings are perfect for heavy loads. Chain slings are best suited for high-temperature environments. Synthetic Web Slings: These lightweight and flexible slings are made from nylon and polyester. Synthetic web slings are color-coded, indicating their load capacity. Round Slings: Round Slings are donuts-shaped, synthetic slings. These provide flexibility and carry delicate loads. Every type of sling is designed with a unique load capacity. For example, synthetic slings can carry up to 6,000 lbs and can be used to lift more delicate and finished materials. For more heavy-duty applications, especially during shipping, construction and marine operations, wire rope slings can handle maximum loads up to 36 tons. Chains slings are used in steel plants, foundries, heavy manufacturing and are the strongest of three as they can carry 100 tons of weight. When selecting the appropriate sling, one must consider the load shape and weight, the surrounding environment, and how delicate load surface is. 2. Shackles: These are U-shaped metal connectors locked by a pin or bolt. Shackles create removable connections and are generally used to connect hooks, slings, and loads in lifting operations. Anchor Shackles: This shackle is a metal loop with a pin, which connects an anchor chain to anchor ring. These have a rounded ''O'' shape. They are best for multiple connection points and are best used in rigging setups. Anchor shackles work best when multiple slings come together, or when wider straps need passing, or when loads shift directionally. Chain Shackles: They are in a narrow ''D'' shape. Chain shackles are generally used to connect lifting chains, single slings, and hoists. They help in crane rigging, heavy equipment lifting, and towing where the load stays aligned with the shackle body. Shackles form a secure link within the rigging assembly, ensuring safe load handling. 3. Hooks: Hooks are used to fasten the loads to rigging assemblies and lifting devices. The following type of hooks offer these specific benefits: Eye Hooks: Feature a closed loop (eye) at the top for permanent or semi-permanent connections Clevis Hooks: Clevis hooks have a clevis pin for quick connection and disconnection. Swivel Hooks: Swivel hooks have an in-built rotating mechanism that helps reduce stress on the sling and ultimate prevent twisting of rigging. Grab Hooks: Designed to grip chain links securely and prevent slipping during lifting. The choice of hooks depends on the type of load, connection requirement and the need to prevent sling twists during lifts. Eye hooks are implemented in permanent rigging as on cranes and lifting beams, where the connector point does not move. Clevis hooks have their best use in construction and transport yards, where loads, such as steel beams and machine parts, need to be rapidly secured and released. Shipyards, warehouses, and fabrication shops use swivel hooks for load lifting in hoisting where the load may freely turn or slide in any direction. For lifting molten metal ladles or large castings in steel mills, foundries, and casting operations, foundry hooks have a wide throat opening to facilitate the job. 4. Eyebolt and Hoist Rings: Eyebolts are single-piece fasteners designed to lift loads vertically, when aligned properly. Hoist rings are heavy-duty lifting assemblies that have a secure base and a rotating ring and are used in commercial lifting applications. The difference lies in their load-lifting capacity. Hoist rings are used for complex, heavy-duty lifts as they maintain their full Working Load Limit (WLL) even at various lifting angles. Eyebolts are made for lighter and static load lifting. Both provide secure attachment points for lifting, but hoist rings are safer and more versatile for multi-directional or dynamic loads. 5. Turnbuckles: For ropes, cables, and tie rods, the tension can be adjusted and controlled with the help of these devices. By twisting the central part of the device, the end fittings slide in and out, which either tightens or loosens the connection. This can be done without twisting the lines that are attached. Following are the different types of turnbuckles commonly seen: Eye-to-eye Turnbuckles: These have closed eyes at the ends of the turnbuckle. This provides a permanent connection, which is ideal for structural braces or for long-term rigging. Jaw-jaw Turnbuckles: Fitted with clevis ends that are pinned and attached to fixed eyes or lugs. Mostly used in heavy lifting, construction, and marine works. Hook-hook Turnbuckles: These have open hooks for quick, temporary connections. Commonly found in cargo hooks. Used for tensioning, which is temporary or short-term. Hook-eye / eye-jaw Turnbuckles: These have different fittings for different connection points, which can be adjusted for setups that need one fixed point, and the other point can be detachable. 6. Pulleys and Blocks: Pulleys are rotating wheel that has a rope running over them. A pulley system provides a major advantage to their user by lifting, lowering, or moving a load in a different direction. They perform this task by applying a force to a load and reducing the effort needed to do the job. In rigging, pulley system is one of the most important components of load movement. They are the reason operators can lift loads at different heights and angles while remaining safe and in control. A block contains a system of one or more pulley wheels within a single frame. Blocks reduce the amount of force required to lift or move heavy loads by distributing weight efficiently. Blocks have the following 2 types: Snatch Blocks: It is a hinged gate that helps in rope insertion. They change the direction of pull or increase lifting power in towering and other rigging operations. Swivel Blocks: These have a rotating swivel hook and shackles that let's block to turn freely under load. They are best suited for marine rigging, crane lifting and material handling where load might shift or rotate. Both aid in smoother, more controlled lifting of heavy loads by providing directional control and mechanical advantage. 7. Wire Ropes & Chains Wire ropes and chains are vital, strong, and resilient materials for lifting, pulling, and fastening loads. They serve pivotal functions due to their flexibility, abrasion, fatigue resistance, and high tensile strength. Wire Ropes: Steel cables made of multiple wire strands twisted together is called a wire rope. They are strong, flexible and resist abrasion making them perfect for use in hoist, cranes and elevators to move or lift heavy loads. Chains: Chains are usedfor securing and lifting heavy loads, especially in rugged or high-temperature environments. 8. Load Binders Load binders are used to keep cargo secure and in place during transport. They prevent loads from shifting and falling by tightening the chains used in conjunction with cargo. They have the following types: Ratchet Binders: Use a ratcheting mechanism to gradually tighten the chain and apply controlled tension. Lever Binders: Use a lever-and-cam mechanism for quick tensioning, though they require more manual force. Load binders are used to firmly and safely transport heavy machinery, materials, and equipment on trailers and trucks. How to Select the Right Rigging Equipment? Selection of right rigging equipment is critical as it affects the safety, expertise, and success of lifting operations in real-life work environments. To ensure that the equipment fits the job requirement, following factors should be considered: 1. Load Type and Weight The knowledge of precise weight and load nature is of utmost importance. Every rigging component has a Working Load Limit (WLL), which is its maximum safe load capacity. It is important to understand the weight and type of load to choose the appropriate rigging equipment. Every rigging component has its own Working Load Limit (WLL) which is maximum load that can be handled safely. The shape, balance, and fragility of the load must also be assessed, as these characteristics influence rigging technique and materials to be used. In the case of irregularly shaped and heavier loads, stronger wire rope or chain slings will be required to ensure stability and control. In comparison, fragile and easily damaged loads will be more safely handled using synthetic slings which will offer soft, supportive, and surface-preserving contact. 2. Environment Rigging conditions affect equipment choice as well. Rigging equipment being used in harsh and corrosive environments needs to be made from non-corrosive materials such synthetic material or galvanized steel galvanized and synthetic steel materials. Temperature also impacts the choice of rigging equipment. Synthetic slings function well in moderate temperatures but degenerate in extreme temperatures. Therefore, steel chains are more suited for high-temperature environments as they can bear high temperatures safely. 3. Lifting Angle Lifting angle is one of the biggest determinants of amount of stress that will be applied to rigging equipment. When the angle between sling legs is less than vertical, tension in each sling is multiplied to a point that it can exceed the actual weight of load. The multiplied tension can exceed load which can cause damage or stress to the rigging equipment that is poorly rated for the lift angle. This is why it is important to understand the correct lifting angle for the respective sling & load type. 4. Match Rigging Equipment Capacity to Job Requirement: To match the rigging equipment with specific job requirements, one should evaluate lift types, available rigging points, load center of gravity, and clearance space around the load. By selecting proper rigging equipment, accidents caused by sling slippage, overloading, and improper attachment can be prevented. In addition, the equipment reliability and compliance can be ensured by obtaining equipment from trusted suppliers and regular inspections. The consideration of factors such as load characteristics, lifting dynamics, and environmental factors can help supervisors choose rigging equipment confidently. How to Inspect Rigging Equipment? Every time before lifting, rigging equipment must be checked thoroughly to ensure it is safe for use. OSHA's standard 29 CFR 1926.251 states that all rigging equipment must be checked in detail by a competent person before each use. Defective equipment must be removed and fixed before usage. Rigging Inspection Checklist: Look for any wear and other damage. These include cuts, fraying, kinks, broken wires, and corrosion in ropes and slings. Make sure shackles, links, and hooks are crack-free and have no stretched openings. All tags and load ratings must be verified and rated for the considered load. Inspect all connections in rigging equipment. Check that bolts, pins, and clips are securely fastened and not worn out. Inspect cranes, hoists, and load lines are working properly without mechanical glitches. Clean all lubricant and debris buildup that can hinder gear's performance. All rigging gear must be inspected by a competent person who is authorized to identify hazards and mitigate them. To help out, we at HAZWOPER OSHA TRAINING LLC are offering OSHA Competent Person for Basic Rigging and Inspection Training. This course helps workers learn rigging gear inspection, fix unsafe conditions, and work safely during operations. The Bottom Line: The backbone of safe and efficient lifting operations is rigging equipment, where each equipment acts as a primary role player in securing heavy loads. The selection of correct rigging equipment needs more than just understanding; it needs diligent evaluation of load characteristics, lifting dynamics, and environmental conditions. After choosing the equipment, ongoing inspections and compliance with ASME and OSHA standards are also non-negotiable. Workers who are trained properly can ensure proper functioning of equipment and safe operations. Rigging should not be treated as a hardware-only practice but as a disciplined safety practice. References: Business Research Insights, Rigging Gear Market Size, Share, Growth, And Industry Analysis, By Type (Aluminum Rigging Gear, Carbon Rigging Gear, Swivels, Other), By Application (Booms, Masts), Regional Insights and Forecast From 2025 to 2033, https://www.businessresearchinsights.com/market-reports/rigging-gear-market-106730 Safety Culture, 15 May 2024, A Guide to Rigging Equipment, https://safetyculture.com/topics/rigging-equipment .fancy-line { width: 60%; margin: 20px auto; border-top: 2px solid #116466; text-align: center; position: relative; } .fancy-line::after { content: "✦ ✦ ✦"; position: absolute; top: -12px; left: 50%; transform: translateX(-50%); background: white; padding: 0 10px; color: red; }

Read More
Different hard hats for the industry workers.

Which Hard Hat is Right for You? Discover the Top 5 Types for Industrial Workers

Which Hard Hat is Right for You? Discover the Top 5 Types for Industrial Workers Introduction: Hard hats are the first line of defense against fatal injuries in the workplace. Industrial workers should not only wear a hard hat but also choose the right one that protects them from their respective work hazard & allows them to do their job efficiently. The wrong type of hard hat or an ill-fitting one; leads to discomfort, distraction, fatigue, and causes employees to lose focus while working. This, in turn, makes them more vulnerable to risks and compliance issues. People often struggle to identify a hard hat that is comfortable to wear, durable, and offers protection. The selection of the correct model of hard hat is dependent on a lot of factors including hazards, workplace conditions, and demands of the job role. That is why in this blog post, we will discuss the top five hard hat types for industrial workers and share tips to help you choose the best one for your needs. What are the Different Types and Styles of Hard Hats? Types of Hard Hats Type I vs Type II While choosing the Type of hard hats, one should first decide whether to go for Type I or Type II protection. Type I The Type I hard hats provide protection against vertical impacts, such as things that fall from above. So, if your worksite contains these types of overhead risks, then go for Type I Hard Hats. For example, construction personnel working below scaffolds where debris/tools have a high probability of falling or warehouse workers positioned to work under racks. Type II If workers face hazards from side, such as bumping into fixed objects or swinging equipment, then Type II hard hats are needed. They protect against top and lateral impacts. Although more costly and hefty, these reduce injury risks in a more complex environment. These types of hard hats are ideal for utility workers and linemen working near moving machinery with clevises, heavy attachments, and loose equipment, often facing a higher risk of side impacts. Confined spaces dwellers in reclined or prone position and likely to come into sideways contact with pipe or pipe and girder structures. Classes G, E, and C of Hard Hats Under the ANSI Z89.1 standard (adopted by OSHA), hard hats are classified by both Type and Class. Type refers to the direction of impact protection (top-only or top and sides) which has been explained earlier, while Class refers to the level of electrical insulation the hard hat provides. Class G Hard Hats (General) They provide basic protection against electrical hazards up to 2200 volts, along with impact and penetration protection. These hard hat types are perfect for general construction and industrial environments. A construction worker who is working close to power tools and temporary wiring needs a Class G hat. Similarly, a maintenance technician who is working in a facility and might come into contact with low-voltage circuits should wear the Class G hard hat. Class E Hard Hats (Electrical) Class E hard hats protect against high voltages of up to 20,000 volts. They are best suited for industries where electrical hazard is a primary hazard. In addition to electrical insulation, they offer a strong impact and penetration protection. For example, a utility line worker who is repairing power lines needs the Class E Hard Hat. In addition, electricians who are working with high-voltage equipment should wear this hat. Class C Hard Hats (Conductive) They only provide impact and penetration protection but lack electrical insulation. These are lighter in weight and offer ventilation, making them ideal for hot environments. These types of hard hats are typically used by manufacturing workers working in an assembly line without electrical exposure. In addition, the material of the hat (fiberglass, composites) also influences the hat's behavior under impact, heat, and over time. Hard hats made of Fiberglass and composites are heat-resistant, impact-resistant, chemical & UV-durable, but heavier, pricey and get brittle with time. On the other hand, hard hats made of thermoplastics (HDPE, ABS, Polycarbonate) are light, cheap, comfy for long wear, but do not offer protection against chemical splashes, UV or prolonged heat exposure. What are the Top 5 Types of Hard Hats that Employers Should Know? Full-Brim Hard Hats These have a brim that goes all around the shell. They offer protection against sun, falling debris, and rain, and keep the neck and ears shielded. These are most suitable for outdoor work in changing environments. Since they provide more coverage, they are heavy and offer less mobility in tight places. Due to their size, they might interfere with other gear, such as face shields and earmuffs, if not customized for compatibility. Brands that design Full Brim hard hats include Lift Safety (DAX series), MSA ( Skullgard Full Brim), Pyramex (Ridgeline Full Brim). Cap-Style Hard Hats This looks like a baseball cap with a brim at the front only. These are lighter & less bulky and offer protection against overhead impact. As they offer limited protection for the neck, ears, and sides, they are best suited to tasks where agility and visibility are much needed. Brands that design these types of hard hats include Pyramex (SL Series), ERB/Fibre-Metal-Cap Style, MSA (V-Gard/Skullgard Cap Style). Vented Hard Hats These include ventilation slots for better airflow. These are best suited for outdoor worksites during humid summer season. Due to the ventilation feature in these hats, they are not effective against rain, chemical splashes, or even electric hazards. Vent holes may allow rain, chemicals, or sparks to enter. The brands that design Vented hard hats are JSP (Vented Full-Brim Hard Hats) and Pyramex (Vented Cap and Full-Brim Options). Bump Caps These are lightweight caps that offer protection against minor bumps and scuffs, not against heavy falling objects. They are suitable for warehouses and indoor low-risk work. These caps are not ANSI-certified for impact protection and should not be used in environments with falling objects or electrical risks. Brands that design bump caps include Pyramex (Bump Caps) and CustomHardHats.com (Protective Caps). High Visibility Hard Hats These hats have bright fluorescent colors, reflective strips, or both that make workers more noticeable at night, in low-light environments, and in high-traffic environments. The added visibility they offer reduces accident risks in areas with moving vehicles and heavy machinery. These hats are useful in road construction and utility work, where being seen is as important as being protected. These are manufactured by the MSA (V-Gard Hi-Viz), Bullard, and ERB Safety. How to Choose the Right Hard Hat for your Job and Worksites? Recommendations Based on Role Each occupation comes paired with a proper hard hat and its accessories for the job. Class E Type I or II hard hats which protect against 20,000 volts is ideal for electricians, and the Class E is a popular option. Welders are required to wear hard hats made out of fiberglass or composite shells that are spark-proof and resistant to extreme heat, in addition to welding face shields for facial protection. Laborers working outside are required to wear full-brim hard hats for sun and rain protection, and to help with airflow. Heavy machinery operators most likely would prefer a hard hat type that is cap styled and with a lower profile and offers protection while bumping against the cabin of the machine. Compact hard hats with a cap design and a ratchet suspension system also work perfectly for workers in confined areas. For workers in the forestry industry, a Type II chin strap hard hat with added face and ear protection is ideal to prevent falling branches and side impacts. In addition to hard hats if you are interested in the types of safety gloves for workplace then check out our article. Environmental Factors Climate also influences the selection of PPE as much as the task does for instance, hot weather requires the use of vented caps, full-brim helmets, which is a good example. In corrosive or wet chemical environments, one should avoid vented helmets in favor of fiberglass or HDPE, which tends to be more resistant to moisture and chemical corrosive settings. For prolonged outdoor usage and UV exposure, full-brim helmets are useful as they protect the face, neck, and ears. In places with high chances of falling or swinging objects, a Type II helmet is a must. Also, one should keep in mind that the helmet should be designed for head and lateral impact. Accessory Compatibility Properly designed add-ons can transform a hard hat into a multifunctional safety system. For instance, light and night work can be done using headlight. In a cutting and/or grinding metal environment, visors can be worn. Cap style with earmuff compatible helmets, offer protection in loud work zones. In addition to these, winds and heights can be faced using a convenient chin strap, which is a must. What Procurement Best Practices Regarding Hard Hats Should Employers Follow? Purchasing hard hats for the team is more than a one-time purchase; it is an investment in compliance, safety, and productivity. That is why employers should treat procurement as a strategic process to save costs, avoid downtime, and ensure workers' safety. These are the four best practices for effective procurement of hard hats. 1. Perform a Hazard and Risk Assessment First, map out the site hazards and determine the type of hard hat that is required, Type I or Type II vs. specialty materials or electrical classes. By this quick assessment, you can buy hard hats that match your job risks. 2. Specify Features and Supplier Criteria Enlist hard hat features in a checklist form, such as suspension type, brim style, venting, and accessory slots. Choose and purchase from suppliers who offer certified products, transparent testing data, and a simple replacement process. 3. Standardize with Bulk Ordering By ordering one hard hat model for the whole team, you can reduce costs and ensure accessory compatibility, making training easier. Ensure warranty coverage and supplier responsiveness for quick replacements. 4. Set-Up Training and Maintenance Policies The effectiveness of a hard hat is only when it is used and maintained correctly. Train workers on how to fit the hard hats properly, perform regular inspections, and replace expired and damaged hats on time. Replacing and cleaning hard hats extends their service life. By following these steps, employers can avoid common mistakes in procurement, such as mismatched gear and temporary helmets. With right planning, the hard hat purchase protects the workers but also enhances consistency, lowers long-term costs, and boosts overall safety culture of the company. In addition to hard hats if you are interested in exploring the types of safety boots then check out our article here. Conclusion The right hard hat is not solely a matter of compliance; it is a matter of aligning protection with real job hazards, work conditions, and supporting value for your teams for years to come. The most efficient employers who thoroughly evaluate numerous hazards, engage in centralized procurement, and plan for maintenance are the ones that create effective, safe worksites that workers trust their gear. However, a hard hat only scratches the surface of a complete safety system. To foster a strong safety culture, workers need to understand the protection modular system. This is the reason advanced training, like our OSHA PPE training, helps employers equip their workers not only with the right gear, but ensures that it is used properly in every situation. This is the reason why putting on right pieces of equipment is so essential to flex. .fancy-line { width: 60%; margin: 20px auto; border-top: 2px solid #116466; text-align: center; position: relative; } .fancy-line::after { content: "✦ ✦ ✦"; position: absolute; top: -12px; left: 50%; transform: translateX(-50%); background: white; padding: 0 10px; color: red; }

Read More
A worker decontaminating his worksite.

How Do You Choose the Right Decontamination Method for Different Hazard Classes?

How Do You Choose the Right Decontamination Method for Different Hazard Classes? Introduction: At hazardous workplaces, the selection of correct decontamination methods is of the utmost importance. When an incorrect decontamination method is used, it can expose the employees to health risks and disrupt operations. The choice of decontamination technique is majorly influenced by the type of hazards. Each hazard class bears unique properties and behaviors that need a special approach to be tackled with a detailed and safe decontamination. In this blog post, we will explain how to select the right decontamination method on the basis of correct hazard classification. How Do You Identify the Hazard Class? Proper decontamination starts with knowing what you are dealing with. Not all hazards are the same, and each requires a specific approach. Accurately identifying the hazard class ensures that the methods you use are effective, safe, and efficient. Different Types of Hazards Class: Normally, three different types of hazards exist which are explained below: Physical Hazards: Include noise, radiation, temperature extremes, and moving machinery. These hazards can cause immediate injuries or long-term health issues. Recognizing them helps determine whether physical removal, containment, or protective measures are needed. Chemical Hazards: Consist of substances that can harm through inhalation, ingestion, or skin contact, such as acids, solvents, or toxic fumes. Understanding the chemical's properties of substances such as corrosiveness, reactivity, volatility guides the choice of neutralizers, absorbers, or other chemical-specific decontamination methods. Biological Hazards: Involve exposure to living organisms or their by-products, including bacteria, viruses, fungi, and other pathogens. These hazards may require sterilization, disinfection, or specialized cleaning protocols to prevent contamination or infection. Key Specific Factors in Hazard Assessment: It is better to assess the characteristics of the hazards before choosing the decontamination methods. The characteristics of the hazards explain the severity of the risk and allow for creating the safest and most effective response. Toxicity: Measure the severity of harm a substance or organism can cause. Higher toxicity often requires stronger or multiple decontamination steps. Flammability: Assess the potential for fire or explosion. Flammable materials need careful handling and compatible cleaning agents. Infectious Potential: Determine how easily a biological agent can spread. High-risk pathogens may require isolation and enhanced protective measures. Reactivity: Analyzing whether a material can react violently with air, water, or any other chemical prevents dangerous incidents during handling or disposal. Corrosivity: Looks at a substance’s capacity to erode skin, metals, or any piece of equipment. Exposure Pathways: Assesses how the hazard can enter the body (inhalation, ingestion, contact with skin, or a needle stick). Guides the required degree of PPE and safety measures that must be used. Quantity and Concentration: Analyzing the quantity & concentration of a contaminant is an important factor to assess. It helps to check if exposure thresholds are reached or not. Physical State: We should consider the state of the hazard i.e. whether it is in solid, liquid, gas or vapor form Affects the rate at which it spreads and the method of containment that must be employed. Environmental Impact: It checks the persistent presence of the contaminant in the environment. It also measures the hazard's possibility of contaminating the environment. How Can You Map Hazards in the Workplace? Hazard mapping is important because employers can derive strategies to prioritize resource allocation by referring to exposure mapping, risk level evaluation, and location assessment, thus providing a visual profile for complex risk areas. The following steps are helpful in mapping hazards in workplaces: Use Sketches and Drawings: For a clearer image of hazards, start with a floor plan and draw probable hazards and the range of invisible hazards like storage places, traps, ventilation systems, and confined places. Use computer mapping tools and hazard registers. Locate Potential Hazards: For every dot you marked, create an inventory and classify it as a hazard, like a biological hazard, chemical, physical, or ergonomic. Determine Risk Exposure: Hazards should not only be assessed for presence, but for frequency and duration of the exposure, the number of workers that will be exposed, and the effectiveness of current PPE or control measures. Prioritize Risks with a Matrix: Use the Risk Assessment Matrix to consider the hazard’s severity (what would the exposure cause) and likelihood (what are the chances it would happen). This will help to allocate the right resources to the most important places. What are the Different Decontamination Methods? The systematic approach that neutralizes, removes, and restrains the hazards in the workplace is termed decontamination. Decontamination method selection depends upon several factors, including the contaminant type, surface, and materials included, and the decontamination level required. What are Physical Decontamination Methods? The process in which contaminants are removed through mechanical action without changing the chemical structure of the material, is called a physical decontamination method. Physical decontamination is done by using specialized equipment and tools in industrial and worksite facilities. Scrubbing and Wiping: It dislodges the contaminants from the surfaces by using pads, brushes, and industrial-grade cloths paired with water and detergents. Mostly, it is used during spill clean-up or surface preparation in manufacturing facilities. Vacuuming: It captures dust, powders, biological contaminants, and asbestos fibers by using high-efficiency particulate air (HEPA) vacuums or industrial hazardous material vacuums. Vacuuming is best for labs, confined spaces, and construction sites. Filtration: It traps microbes and other particulates by using mechanical and HEPA filter in air-handling units, liquid filtration systems, and respirators. Filtration is mostly used in chemical plants, cleanrooms, and wastewater facilities. Mostly physical decontamination is the 1st step in the broader process. It lessens the surface contamination, cleans equipment, areas, and structures for chemical, thermal, and biological treatments. What are Chemical Decontamination Methods? In chemical decontamination methods, chemical agents are used to neutralize, remove, and break down the hazards. These methods are widely used in workplaces that face chemical and biological risks. Following is a brief overview of the different chemical agents used to mitigate chemical hazards: Disinfectants: Chemicals like bleach, alcohol, and others that kill and inhibit the growth of microbes. Neutralizers: These substances neutralize hazardous chemicals, making them harmless. Oxidizers: Oxidizing agents chemically break down the hazardous substance into less damaging byproducts. These includes hydrogen peroxide and peracetic acid. Chelating Agents: These are substances such as EDTA that bind with heavy metals and remove or stabilize the hazards. They work best in environments where toxic metals are present. Solvents and Surfactants: These chemicals remove contaminants from the surfaces by dissolving and lifting them up, making their removal easier. Solvents are used for greases, oils, and hydrophobic materials. Enzymatic Cleaners: These are biological catalysts that break down organic contaminants, including fats and proteins. These are utilized in food processing, healthcare, and wastewater treatment settings. Chemical decontamination methods are useful against many hazards but should be applied carefully. Their use often leads to secondary hazards such as corrosion risk, toxic byproducts, and contamination of environment. The chemical decontamination methods should be selected, handled, and implemented properly to ensure the safety of the worksite. What Are Thermal Decontamination Methods? These methods use heat to destroy and remove hazardous contaminants, especially microbes. Thermal decontamination is effective depending on factors such as exposure duration, temperature, and contaminant types. Thermal decontamination is very effective for inactivation of a wide range of pathogens and resistant spores. Moist Heat (Steam Sterilization/Autoclaving): It uses saturated steam under pressure for 15-20 minutes at 121 °C. Moist heat is used to sterilize medical tools, worksite materials, and laboratory equipment that can bear the high heat and moisture. Dry Heat Sterilization: It uses hot air ovens at 160-180 °C for a prolonged time duration. Dry heat sterilization is suitable for powders, glassware, and metal instruments that cannot be sterilized using moist heat. Incineration: It burns contaminated materials at very high temperatures, turning them into ashes. Incineration is used for biohazardous waste, and other materials that are too dangerous to reuse. Infrared or Microwave Heating: It uses electromagnetic energy or infrared radiation to heat up and destroy contaminants. It is mostly used in specialized labs and industrial settings. Thermal decontamination methods are powerful methods for sterilization and decontamination but are not appropriate for heat-sensitive materials such as electronic components, plastics, and other delicate instruments. In those cases, either physical or chemical decontamination methods should be applied. In certain scenarios, a single method may not be enough to get the desired level of decontamination. Therefore, a combination of different decontaminations methods proves effective. The combination methods are quite helpful in high-risk situations when multiple types of contaminants are present. How to Choose a Contamination Method According to Hazard Classes? The selection of a suitable decontamination method is important for the effective neutralization of the hazards while staying safe. Here is how you match the decontamination techniques to the various hazard classes. What Key Factors Should be Considered in the Selection of Decontamination Methods? The appropriate decontamination method should be selected after evaluating many factors such as effectiveness, safety, and efficiency. 1. Surface Material and Equipment Compatibility: It is important to analyze the surface of the contaminated area in order to ensure that the correct decontamination method can be applied and the surface does not hinder the process of decontamination. For example, porous materials such as fabrics and wood might absorb chemicals. It makes these materials harder to clean and possibly degrade the material. Metals or plastics may degrade or corrode when exposed to chemicals and extreme temperatures. So, it is essential to choose the decontamination methods that are suitable for particular materials and equipment to ensure there is no damage during decontamination. 2. Safety of Workforce and PPE Requirements: The process of decontamination exposes workers to hazardous substances. Therefore, it is important to evaluate the potential risks that might incur during the decontamination method and then ensure that the required PPE is available. This includes goggles, gloves, protective clothing, and respirator use. In addition, workers should be trained to perform decontamination procedures and PPE usage to reduce exposure. 3. Environmental Impact: It is important to evaluate the environmental impact of the decontamination method. Toxic byproducts produced during chemical decontamination, when not disposed of properly, can easily contribute to pollution. Therefore, it is better to choose eco-friendly decontamination agents and methods to reduce environmental harm and keep up with sustainability goals. How Should You Neutralize Chemical Contaminants? Chemical hazards can be decontaminated by using methods that reduce their toxicity and remove these contaminants physically. But material compatibility, reactivity, and environmental factors. Should be considered before implementing any type of decontamination method. Neutralization: Neutralization is effective for corrosive materials, although it should be done in a cautious way to avoid chain reactions. For example, acidic contaminants like sulfuric acid can be easily neutralized by sodium bicarbonate, which is basic in nature. Solvent Cleaning: Solvents such as acetone and ethanol dissolve organic contaminants. Solvent cleaning is useful for oils and resins, but can deteriorate plastics, coatings, and other sensitive surfaces. Absorption Techniques: Activated carbon and absorbent pads are used to capture liquids and vapors. The saturated absorbents should be disposed of as per hazardous waste protocols. What are the Effective Decontamination Methods for Biological Hazards? Biological hazards need a decontamination method that destroys pathogens. The effectiveness of biological decontamination is dependent upon the type of organism, the surfaces where they are found, and the level of contamination. Disinfection: Is done by using alcohols, bleach, and quaternary ammonium compounds to kill microbes. The resistant spores survive this method. Sterilization: Using autoclaving and dry heat to reduce all forms of microbial life. It is best for decontaminating reusable instruments. PPE Considerations: Gloves, gowns, and respirators should be used to reduce exposure for workers while cleaning up. Scenario ExampleDuring COVID-19 pandemic, hospitals and labs decontaminated their surfaces by using 10% bleach and 70% ethanol. The instruments were sterilized by using autoclaving to prevent the spread of viruses and bacteria. What Are Effective Decontamination Methods for Physical Hazards? Debris, particulate matter, and dust are removed by physical methods. The physical decontamination method depends upon the particle size, the sensitivity of the equipment, and the work environment. Debris Removal: Done manually by collecting and disposing larger solid wastes. This is done by using heavy-duty tools and loaders used on construction sites. Dust Control: Done by using HEPA-filtered vacuums and wet suppression to reduce the presence of airborne particles. Surface Cleaning: Surfaces are cleaned by using wipes, brushes, and pressure washing. It removes residual particulates from walls, floors, and machinery. Real Life ScenarioThe debris and dust after the World Trade Centre Collapse were collected by using silica, asbestos, and glass fibers. Physical decontamination was done by using heavy machinery, wet suppression methods, and HEPA-filtered vacuums. Conclusion The choice of an appropriate decontamination method is of utmost importance for keeping a safe and compliant workplace. By evidently understanding the hazard class, employers can develop and utilize decontamination strategies accordingly. Those who want to have an in-depth understanding and application of decontamination procedures, can refer to the following training programs. OSHA 40-Hour Hazwoper Training: designed for workers who perform hazardous waste operations. It primarily covers hazard recognition, PPE usage, and emergency response procedures. OSHA 24-Hour Hazwoper Training: made for workers who might be exposed to hazardous substances but do not directly perform hazardous waste operations. OSHA 8-Hour Hazwoper Supervisor Training: Intended for supervisors who manage hazardous waste operations. References: Occupational Safety and Health Administration, Decontamination, https://www.osha.gov/hazardous-waste/decontamination .fancy-line { width: 60%; margin: 20px auto; border-top: 2px solid #116466; text-align: center; position: relative; } .fancy-line::after { content: "✦ ✦ ✦"; position: absolute; top: -12px; left: 50%; transform: translateX(-50%); background: white; padding: 0 10px; color: red; }

Read More
A group of hazmat employees dressed in full suits.

Do Non-Response Employees Need Hazmat Physicals and Medical Monitoring?

Do Non-Response Employees Need Hazmat Physicals and Medical Monitoring? Introduction: When we talk about hazmat safety, the focus is on the hazmat teams, first responders, firefighters, and emergency personnel. But the non-response employees are completely overlooked. Even though non-response employees also face chemical exposure and hazards. This issue raises an important question: do non-response employees need the same physicals and medical monitoring as their emergency-response counterparts? The regulations by OSHA and DOT make it clear that medical operations are not limited only to the emergency personnel. That is why employers should evaluate exposure risks within all the roles and make sure that workers who are in contact are monitored and protected. Medical evaluations and hazmat physicals help to detect health issues early and prevent long-term illnesses from escalating. in this blog post, we will break down the details about hazmat physicals and medical monitoring. Who qualifies as a Non-Response Employee? Employees who do not directly deal with hazmat emergencies or handle hazardous materials but still work in proximity and support roles qualify as non-response employees. Non-response employees include facility workers, maintenance staff, and security personnel. Non-response employees face exposure risks from leaks, spills, and residual contamination. Recognizing their role is important, as OSHA's medical monitoring and physical exam requirements extend beyond immediate responders. What are the Hazmat Regulations for Non-Response Employees? Non-response employees also have to fulfill hazmat regulations as they work in environments where risk of exposure exists. In this section, we will uncover the scope of hazmat regulations and why non-response employees should be included in safety and medical monitoring plans. Do Hazmat Regulations Apply to Non-Response Employees? The answer is yes; hazmat regulations extend beyond emergency responders. Any employees who are exposed to hazardous substances as part of their job, though not directly, fall under the OSHA and DOT requirements. It includes those workers who manage, store, transport, and work in close premises to hazardous materials. To stay compliant, these employees must undergo proper training, use PPE, and get medical monitoring when exposure thresholds are crossed. Employers should evaluate possible risks for people in non-response roles. The employees under these roles should be provided with the same safety and health protections as responders. By ignoring this responsibility, the organization violates regulations and also makes its employees vulnerable to long-term health risks. What are the DOT and OSHA Requirements? OSHA focuses on workplace exposure to hazardous substances. It requires employers to provide medical monitoring, training, and periodic physical exams. This ensures that the non-response employees are protected from possible chemicals and other hazards in the workplace. In contrast, the DOT supervises the transportation and handling of hazardous materials, trains, and mandates the proper certification. DOT governs safety procedures for employees who move and manage the hazmat. The non-response employees who interact with or stay near transported hazardous materials should stick to these regulations to ensure compliance. What are Hazmat Physicals and Who Needs Them? The following section breaks down the purpose of hazmat physicals and highlights where they should be applied: What is Hazmat Physical and its Purpose? Hazmat Physical is a specialized medical exam that OSHA mandates for employees exposed, or possibly exposed to hazardous materials such as biological agents, chemicals, and radioactive substances. This exam assesses the general health of employees and detects early effects of exposure, ensuring that employees are fit to perform their duties safely. The typical Hazmat physical exam covers health history, lung function, physical assessment, hearing tests, and urine or blood analysis. In What Scenarios do Non-Response Employees Need Hazmat Physicals? Non-response employees working near chemical storage, with contaminated equipment, or supporting   hazardous operations, need to get hazmat physicals. Even though they do not directly handle hazardous materials and spill cleanup; routine duties, and emergency situations can expose these employees to risks. Employers must assess risks and arrange Hazmat physicals to stay compliant with OSHA and keep the workplace safe. What is Medical Monitoring and what does it Include for Non-Response Employees? A continuous program that covers biological testing, regular evaluation, and exposure tracking is termed medical monitoring. Medical monitoring is more than a one-time monitoring of physical changes in the employee’s health due to chemicals, particulates, and other hazards. Medical monitoring also includes review of the medical history, lab tests (urine, blood), lung function, and hearing evaluations. It allows early detection of diseases and thus timely intervention to ward off occupational illnesses. What Key Indicators are checked during medical monitoring? Medical monitoring for hazmat-exposed employees may include checks on liver and kidney health, respiratory function, neurological symptoms, skin conditions, and biological markers of certain toxins. By identifying medical abnormalities early, healthcare professionals can provide timely intervention, ensuring employees receive proper care, What Frequency and Documentation are Required for Medical Monitoring? OSHA Standards (29 CFR 1910.120) mandates medical monitoring exams under specific conditions. Non-response employees who might be exposed to hazardous materials need medical monitoring in the following situations: Pre-Assignment: Before starting a job that includes possible hazmat exposure. Periodic Evaluations: Needed at least annually while working in the role. Post-Exposure or Symptom-Based: After a suspected over-exposure or when symptoms arise. Job Reassignment or Termination: When changing jobs with various exposure levels or when quitting a job. Recordkeeping Requirements: Employers must keep confidential records of all medical evaluations, test results, and physicians' opinions. These records must be kept confidential to preserve the employee's privacy. By maintaining these records, the employer can stay compliant and protect employees How Proper Medical Monitoring Protects Employees and the Company? Proper medical monitoring helps in two ways: it protects employee's health by detecting exposure effects and prevents workplace illnesses. companies can reduce legal liabilities and have fewer employee absences due to injury or illness. In addition, it develops a safety-first culture that increases employee morale and retention. By routinely monitoring and conducting risk assessments, workplaces can also stay aligned with the evolving OSHA regulations, maintaining the company's reputation and ensuring smooth business operations. How to Evaluate Exposure Risk for Non-Response Employees? Employers must assess whether non-response employees are at risk of hazardous substance exposure in their routine duties. This starts with identifying potential hazards in the work environment such as proximity to chemical storage, handling materials during maintenance, or working in areas where accidental releases could occur. Employers can then assess the severity and likelihood of exposure by reviewing operational activities, incident history, and possible exposure routes (skin absorption and inhalation). Based on this assessment, employees can be categorized by exposure risk level, and appropriate protective measures and medical monitoring protocols can be established. The Wrap-Up: Non-response employees are not automatically required to undergo hazmat physicals or medical monitoring, but employers must carefully evaluate their actual exposure risks. If tasks place them near hazardous substances, baseline exams, periodic monitoring, and preventive measures may still be needed. Alongside medical surveillance, appropriate training such as OSHA’s 24-hour or 40-hour HAZWOPER programs, depending on the employee’s exposure level, ensures workers understand the hazards they may encounter and how to protect themselves. Taken together, these steps create a safer, compliant workplace for everyone. .fancy-line { width: 60%; margin: 20px auto; border-top: 2px solid #116466; text-align: center; position: relative; } .fancy-line::after { content: "✦ ✦ ✦"; position: absolute; top: -12px; left: 50%; transform: translateX(-50%); background: white; padding: 0 10px; color: red; }

Read More