
 EN
EN ES
ES


A Complete Guide to OSHA Floor Marking Requirements
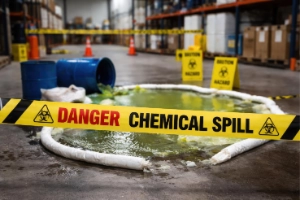
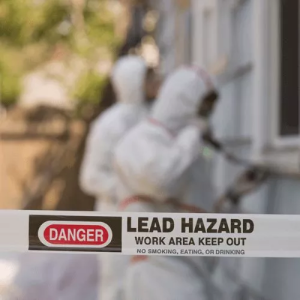
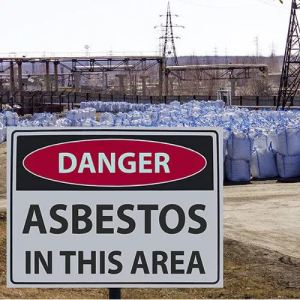
A Complete Guide to OSHA Floor Marking Requirements Introduction:Clear floor markings are a key element of workplace safety. In 2024, private industry employers reported 479,480 nonfatal injury cases involving slips, trips, and falls that resulted in days away from work. Floor markings help guide employees, separate pedestrian and vehicle traffic, and highlight hazardous zones such as chemical storage areas, electrical panels, and high-traffic machinery.For employers, effective floor marking requires more than placing tape or paint on the floor. Materials must be durable, visible, and suitable for the work environment. Colors should follow recognized safety standards to communicate warnings consistently. Regular inspection and maintenance are essential to prevent faded or worn markings from creating hazards instead of reducing them.Floor markings also enhance operational efficiency by clearly defining aisles, storage areas, and equipment zones, helping employees move safely and quickly. Their effectiveness depends on proper employee training, as even precise markings provide limited protection if workers do not understand their meaning.This guide provides a complete overview of floor marking practices, including color codes, placement strategies, material options, and maintenance tips.Why Floor Markings at the Workplace Matter?Floor markings are more than just colored lines on a floor; they serve as essential visual cues that help employees understand the layout of a facility at a glance. In busy industrial and warehouse environments, clear markings direct foot traffic, separate pedestrian routes from vehicle or equipment zones, and define work and storage areas. This kind of visual organization makes it easier for workers to navigate complex spaces, reducing confusion and keep operations smooth.Clear markings also play a direct role in preventing accidents. By highlighting safe walkways, alerting workers to hazardous zones, and identifying areas where machinery operates, employers can significantly reduce the chance of slips, trips, falls, and collisions, which are common causes of serious workplace injuries.Beyond safety, floor markings improve operational efficiency. When personnel know where to walk, park equipment, or place materials, tasks get done faster with fewer interruptions and errors. This enhances workflow, minimizes bottlenecks, and supports better space utilization.Floor markings also reinforce safety culture. They make hazard communication intuitive, helping employees instinctively recognize risks and safe areas without stopping to interpret complex signs. This continuous visual guidance complements training programs and supports safer behaviors throughout the facility.In short, floor markings help employers:Prevent injuries by reducing confusion and clearly separating hazards.Improve organization and workflow through structured layout guidance.Enhance visual communication so workers instinctively understand operational boundaries.All of these benefits contribute to a safer, more efficient workplace with fewer accidents, smoother operations, and clearer expectations for employees.Overview of OSHA Standards Governing Floor MarkingsOSHA’s Walking-Working Surfaces standard requires employers to keep floors, aisles, and walkways clean, orderly, and free of hazards so employees can access work areas safely. It covers general maintenance, housekeeping, and ensuring safe access and egress. While this standard no longer explicitly states “mark floor lines,” it supports using visual demarcation, such as floor tape, paint, or other markers, as a practical way to help separate walking paths from hazards and identify safe routes. Employers should evaluate their facilities to determine the best methods for clearly defining these zones so workers can recognize them easily.Materials Handling and Storage Standard (29 CFR 1910.176)The Materials Handling and Storage standard directly addresses aisle safety where mechanical handling equipment, such as forklifts or pallet jacks, is used. It requires employers to allow sufficient safe clearances for aisles, loading docks, and passageways, and to keep them clear and in good repair. It also states that permanent aisles and passageways must be “appropriately marked.” This requirement recognizes that marking aisles helps define safe movement zones, but it does not prescribe specific marking colors or materials. Employers may use painted lines, floor tape, stenciled symbols, cones, or other visual cues, as long as they are clear, visible, and included in employee training.OSHA vs. ANSI: Mandatory Standards vs. Best PracticesOSHA standards focus on performance requirements, ensuring aisles and passageways remain safe, clear, and marked without dictating exact methods. This flexibility allows employers to tailor floor-marking solutions to their unique operations. In contrast, the American National Standards Institute (ANSI) and other consensus-based systems provide guidelines and best practices, including recommended color schemes, patterns, and marking conventions. While ANSI standards are voluntary and not legally enforceable, adopting them can help facilities improve consistency, enhance visual communication, and align with OSHA’s performance goals, reducing misinterpretation or confusion during inspections.Area by Area Floor Marking StrategiesCreating a safe and organized workplace starts with clear visual cues on the floor. Proper floor marking helps employees navigate aisles, identify hazards, and maintain unobstructed access to emergency equipment. The strategies below provide practical, area-specific guidance to keep your facility efficient and accident-free.Aisles, Exit Routes, and Emergency EquipmentPermanent Aisles and ClearancePermanent aisles are common in warehouses, manufacturing floors, packaging facilities, and distribution centers. These are the main travel paths for both people and equipment, such as forklifts or pallet jacks. To clearly define these spaces:Use solid yellow lines, at least 2–4 inches wide, to outline the aisle boundaries.Maintain a minimum 36-inch clearance on each side of aisles for pedestrian areas, and at least 48–60 inches for areas where forklifts or pallet jacks operate.Reinforce visibility by adding reflective or high-contrast tape in dusty or low-light environments.In high-traffic zones, consider double lines or cross-hatched zones to signal merging areas or intersections.Exit Routes and Emergency AccessClearly marking exit paths ensures everyone can find safe egress during emergencies. Best practices include:Application of photoluminescent tape along floor paths leading to exits, which remains visible in low-light or smoky conditions.Usage of continuous lines instead of dashed markings to reduce confusion.For wide corridors, marking the center with a 2-inch wide line to guide pedestrian flow and keep lanes organized.Emergency Equipment AreasFire extinguishers, eyewash stations, and safety showers must remain accessible at all times:Mark a 36-inch clearance zone around equipment with red-and-white hatched tape.For added visibility in dim areas, use reflective or glow-in-the-dark tape.In busy warehouses, extend floor markings slightly beyond the minimum clearance to prevent pallets or carts from accidentally obstructing them.Hazardous Areas, Equipment, and Traffic ControlPedestrian Walkways and Vehicle Traffic SeparationSeparating people from forklifts and other vehicles is critical:Use solid green lines, at least 3 inches wide, to define pedestrian walkways.Install physical barriers or posts at intersections to reinforce separation in high-traffic areas.Where forklifts cross pedestrian paths, use yellow-and-black striped tape with warning signage for added caution.In packaging or manufacturing units, consider angled or chevron patterns at entry points to highlight pedestrian zones.Electrical Panel and Hazard ZonesWork areas around electrical panels must be kept clear for safety and maintenance:Mark a 36-inch keep-clear zone around all panels with yellow floor tape.For high-voltage panels, add red border tape or warning symbols to emphasize risk.In machine shops, extend markings to include floor space where tools or carts are commonly stored to prevent accidental blockage.Chemical Storage and High-Hazard AreasProperly marking hazardous zones prevents accidental exposure and reinforces safe handling:Use colored floor lines to outline chemical storage areas (for example, blue for flammables, green for non-hazardous chemicals, red for corrosives).Include cross-hatched patterns to indicate no-go zones where only trained personnel may enter.In laboratories and packaging units, use wide lines (3–4 inches) combined with hazard symbols painted or taped on the floor for immediate visual recognition.Practical Notes for EmployersBest Practices for Floor Marking Implementation & MaintenanceStart with a Risk‑Based PlanAssess your facility’s traffic patterns and hazards first. Mark pedestrian routes, powered equipment lanes, and high‑traffic intersections, to prevent collisions and confusion. Tie your marking decisions back to OSHA’s requirement for safe clearances and defined aisles where mechanical handling equipment is used.Use Consistent, Clear MarkingsCreate a simple legend defining what each color or line type means and share it with all employees. Consistent visual language helps workers quickly understand where they should walk, where vehicles operate, and where hazards are present.Choose Durable, Visible MaterialsSelect heavy‑duty floor tape or paint based on surface conditions and traffic levels. Heavy‑duty tape or epoxy paint lasts longer in forklift and equipment areas, while lighter tape can be used in less active zones. Clean, dry floors before application for better adhesion.Maintain Markings RegularlyScheduled inspections should include checking floor markings for wear, fading, or damage. Faded or missing lines can reduce visibility and increase hazards, so replace or touch up markings promptly.Train Employees on Marking MeaningMarkings are only effective if workers understand them. Include floor marking definitions in onboarding and refresher training to reinforce safe movement and hazard awareness throughout your facility.ConclusionEffective floor marking is an essential visual safety control that keeps pedestrians, equipment, and hazard zones clearly defined; which in turn helps, prevent incidents, and support smoother day‑to‑day operations. Clear markings work best when paired with a workforce that understands how to recognize hazards, interpret visual cues, and follow safe practices consistently.To strengthen that foundation, many employers invest in tailored safety education that deepens hazard awareness and enhances compliance skills. One option is the online corporate training services offered at Hazwoper OSHA Training LLC, which provide flexible, self‑paced safety courses designed to improve regulatory knowledge, hazard recognition, and practical safety behavior across your team.Training that builds employee competence from hazard communication and general industry safety to more advanced topics, promotes a proactive safety culture. When people understand why markings matter and how hazards arise, they’re more likely to act safely and contribute to long‑term operational excellence. .fancy-line{width:60%;margin:20px auto;border-top:2px solid #116466;text-align:center;position:relative}.fancy-line::after{content:"✦ ✦ ✦";position:absolute;top:-12px;left:50%;transform:translateX(-50%);background:white;padding:0 10px;color:red}
Read More